Gmail: Boost your productivity with these tips and tricks
Master your inbox with these Gmail tips and tricks.
We covered the basics of Gmail for Android in our beginner's guide, and now it's time to take a look at features that extend the functionality of the email client. Whether it's creating labels to categorize your email or using filters to automatically sort incoming mail, Gmail offers a variety of tools aimed at managing your inbox clutter.
If you haven't already, you should enable two-factor authentication on your Gmail account. Two-factor authentication works by combining something you know (a password) with something you have (your phone), effectively doubling your account's security.
- How to change sync settings in Gmail
- How to use Action Confirmations in Gmail
- How to use Auto-advance in Gmail
- How to use the vacation responder in Gmail
- How to search in Gmail
- How to create labels in Gmail
- How to filter messages in Gmail
- How to add an alias in Gmail
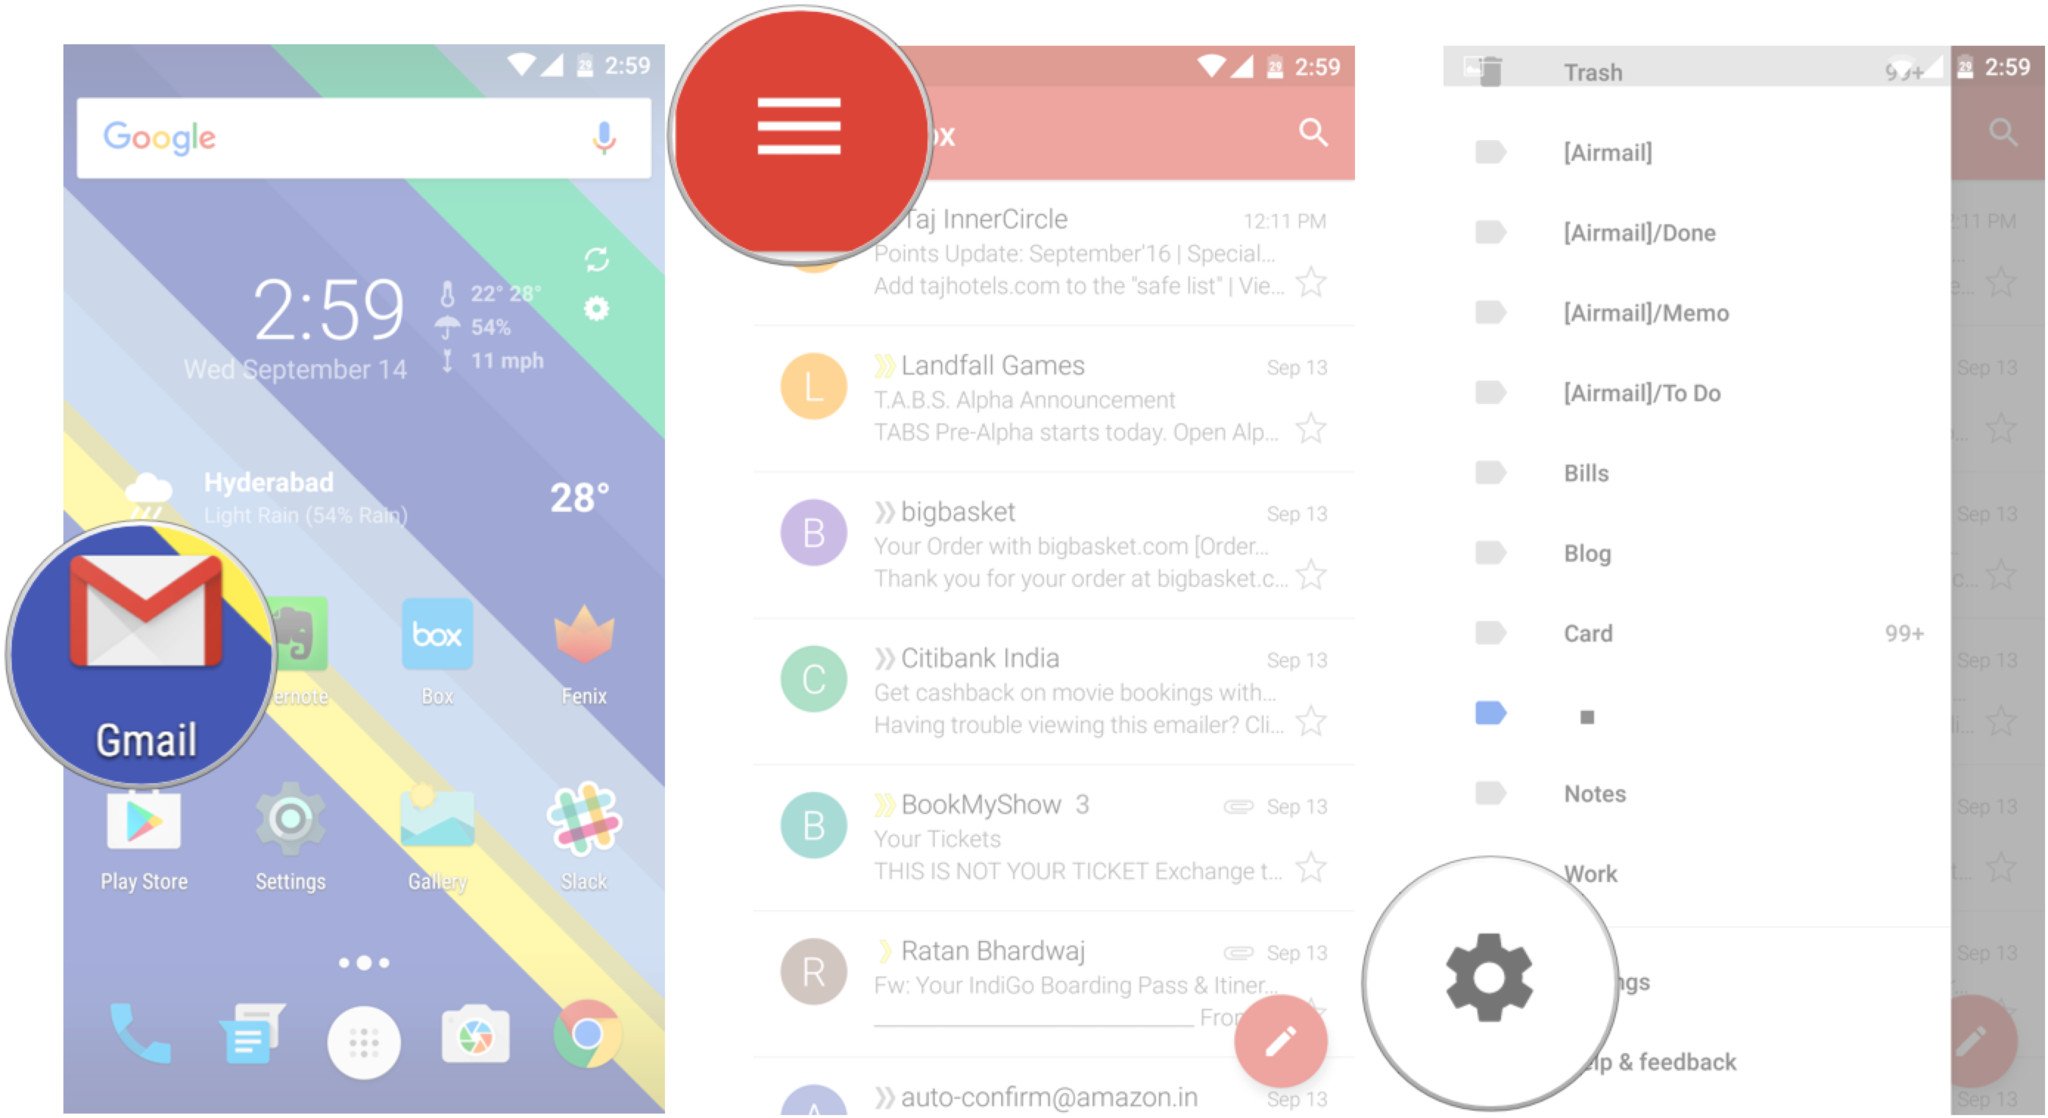
Gmail automatically syncs emails for up to 30 days on your phone, but if that isn't sufficient, you can manually increase the sync duration from the settings.
- Open Gmail from the home screen.
- Tap the hamburger menu in the top left corner.
Navigate to the bottom of the pane to find Settings.
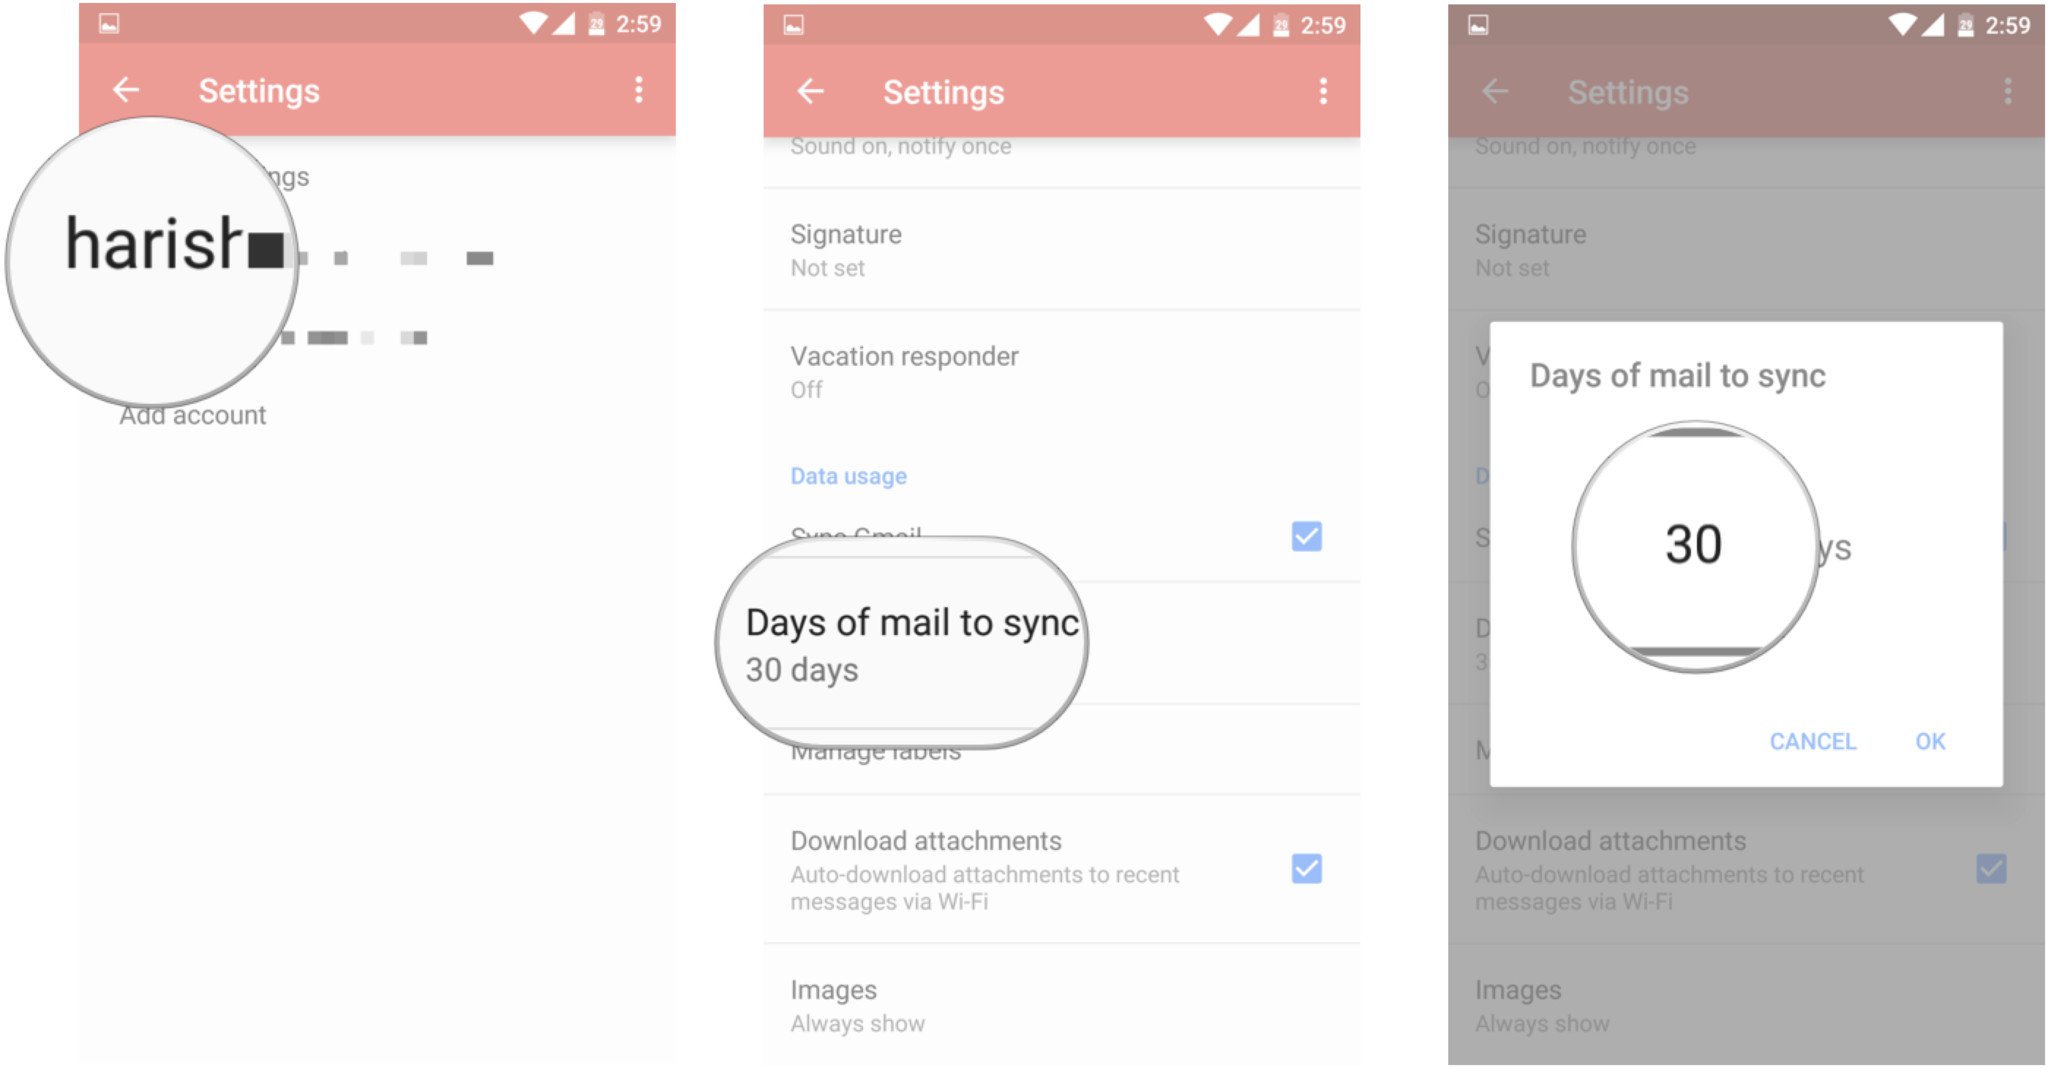
- Select the Gmail account for which you want to change sync settings.
- In the account settings, navigate to Days of mail to sync.
Enter the desired number of days in the textbox.
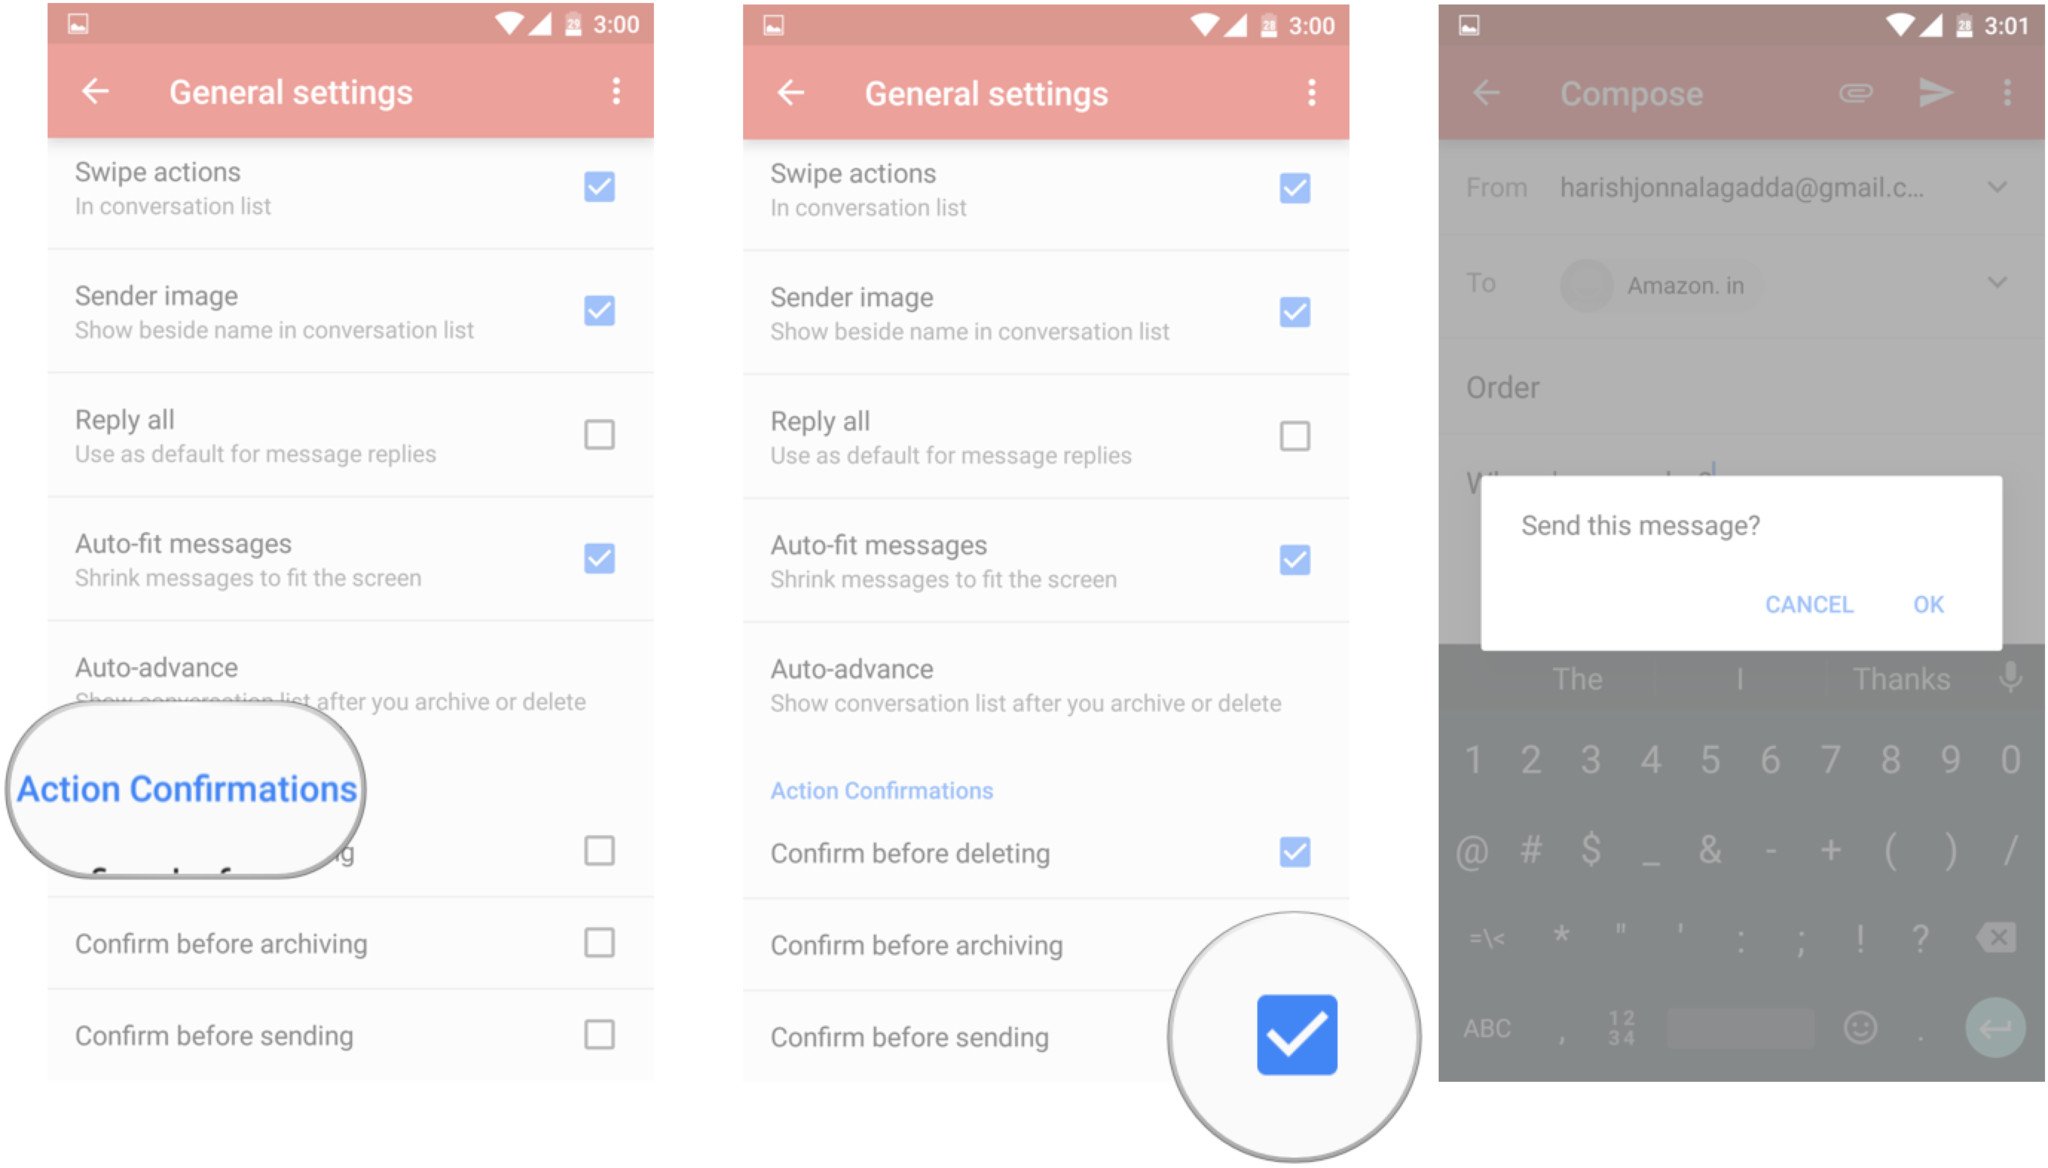
Gmail on the desktop has an Undo send feature that comes in handy when you spot a mistake in your email the second after you hit the Send button. The feature isn't available on Android, and the closest you get to similar functionality is through Action Confirmations. With the setting enabled, you'll see a dialog box pop up every time you send, archive, or delete a message asking you to confirm the action.
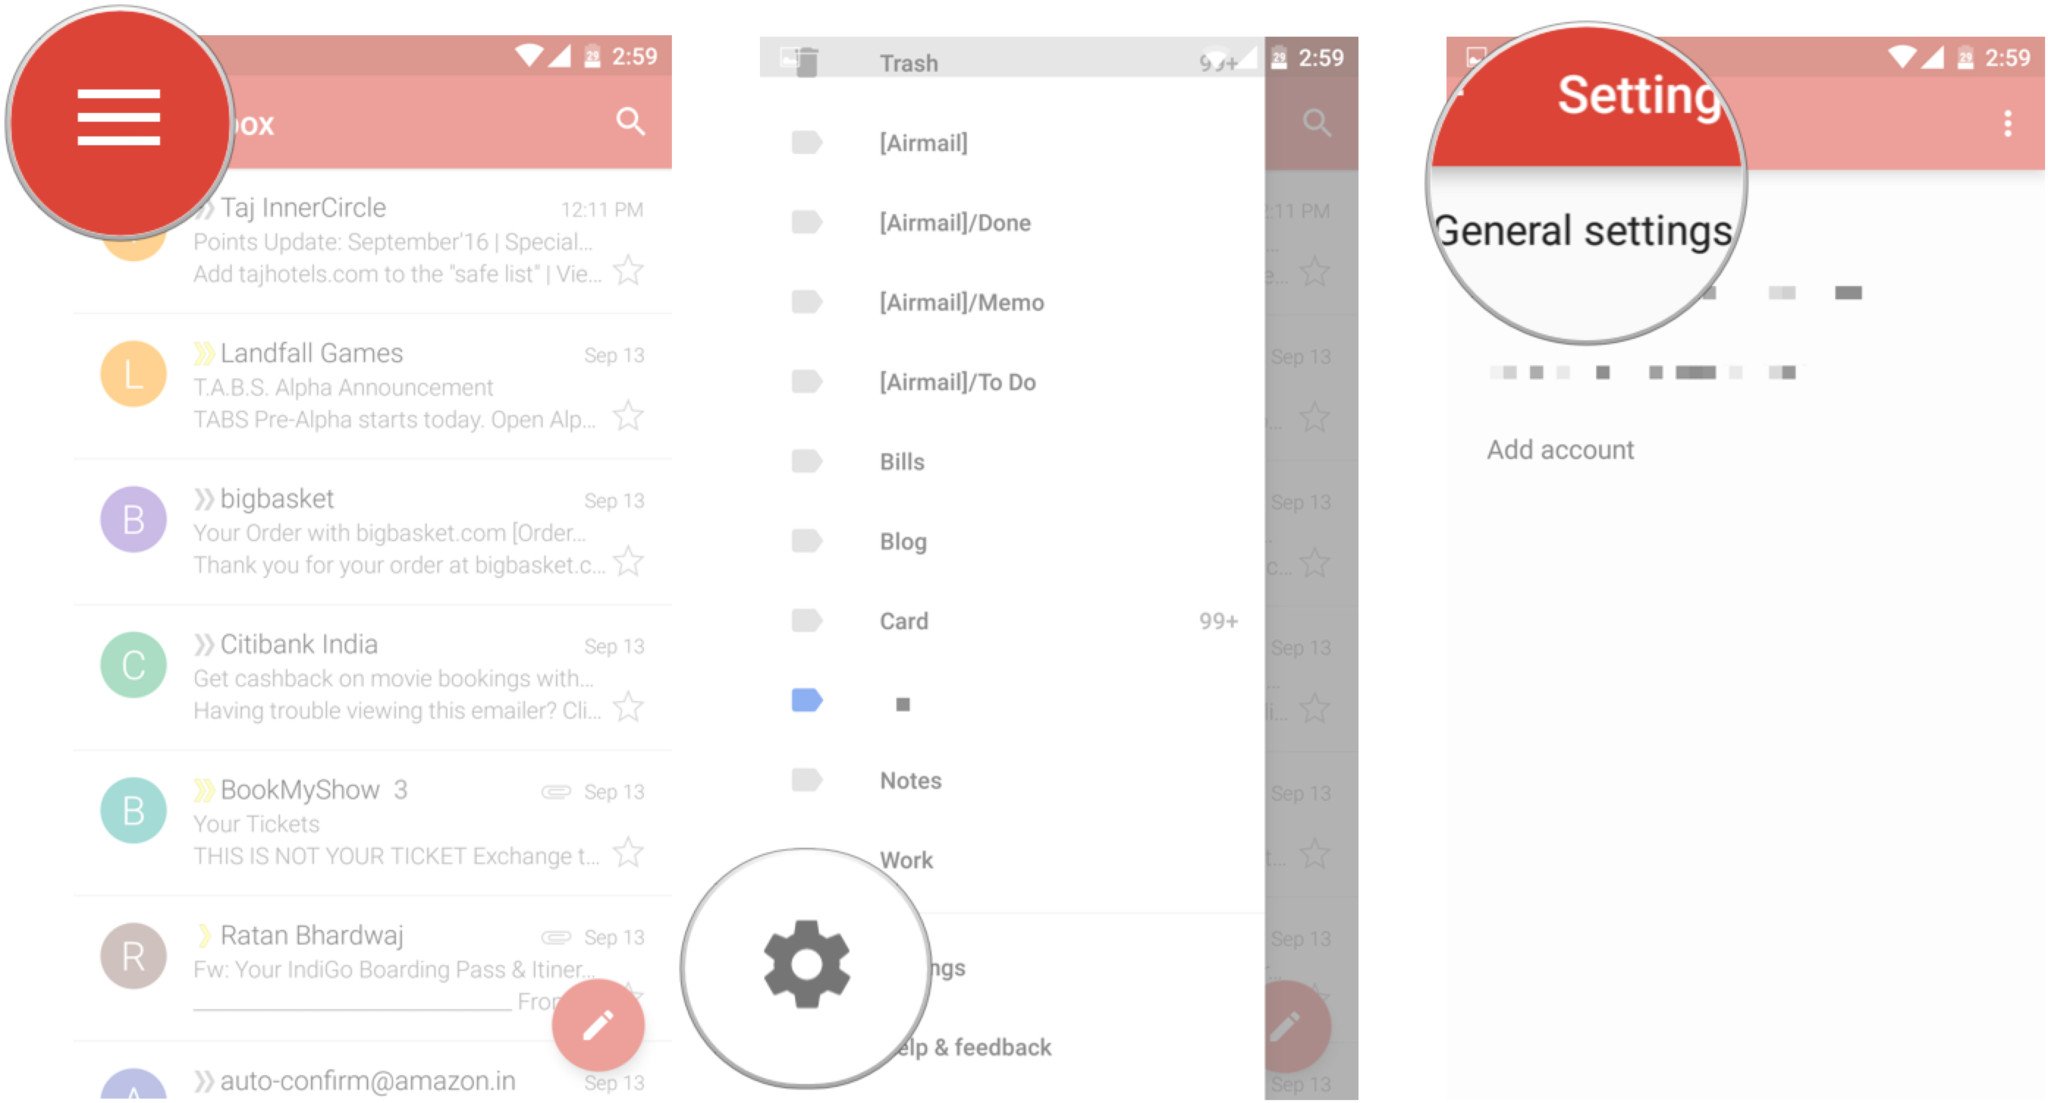
- Tap the hamburger menu in the top left corner.
- Navigate to Settings.
Select General settings.
- Navigate to the bottom of the page to see Action Confirmations.
Select the checkboxes next to each corresponding action.
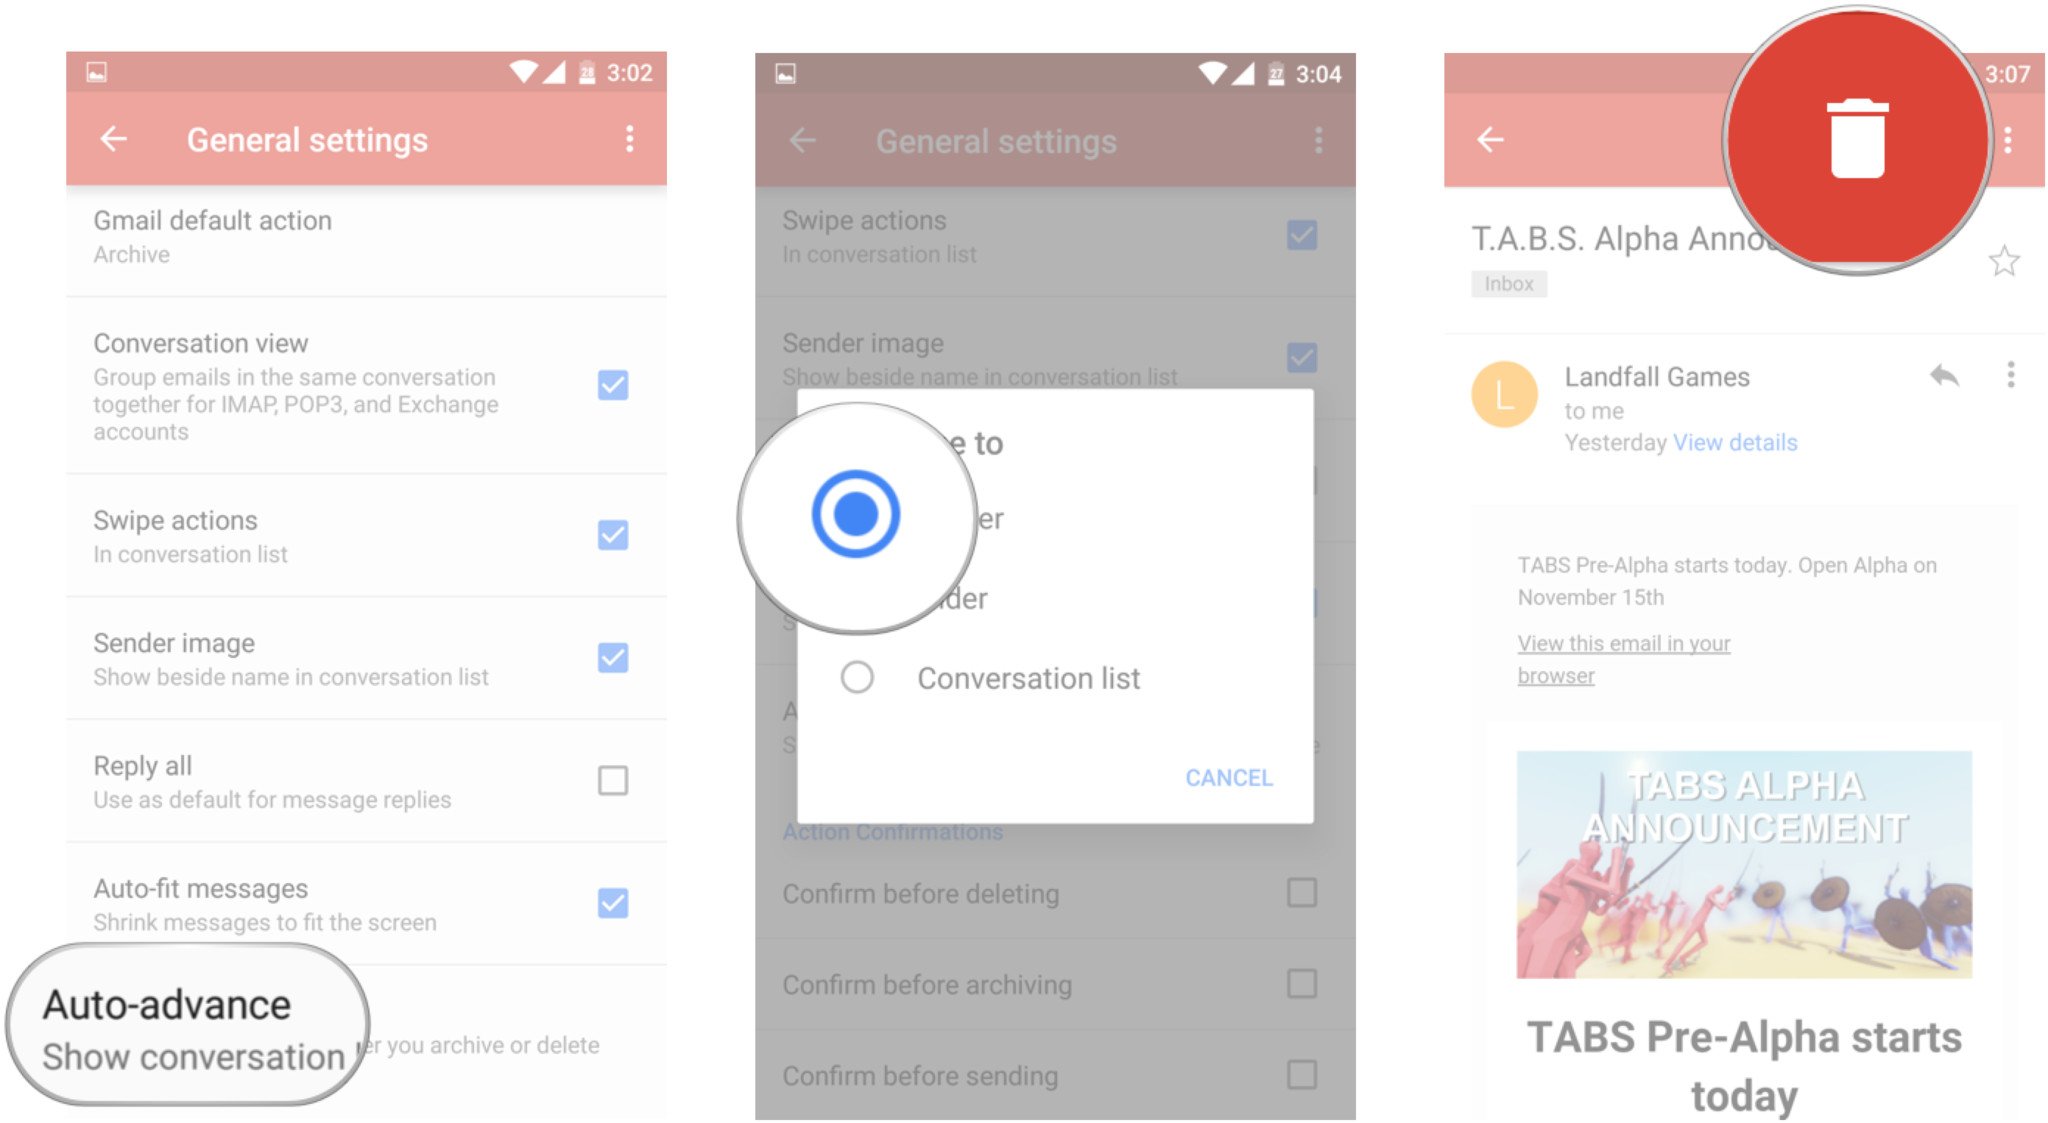
Gmail's Auto-advance is a great time-saver if you have a lot of unread emails. The feature lets you automatically move to the next unread email in your inbox after you've archived or deleted a particular thread.
- Tap the hamburger menu in the top left corner.
- Navigate to Settings.
Select General settings.
- Tap on Auto-advance.
Select between Newer, Older, or Conversation list.
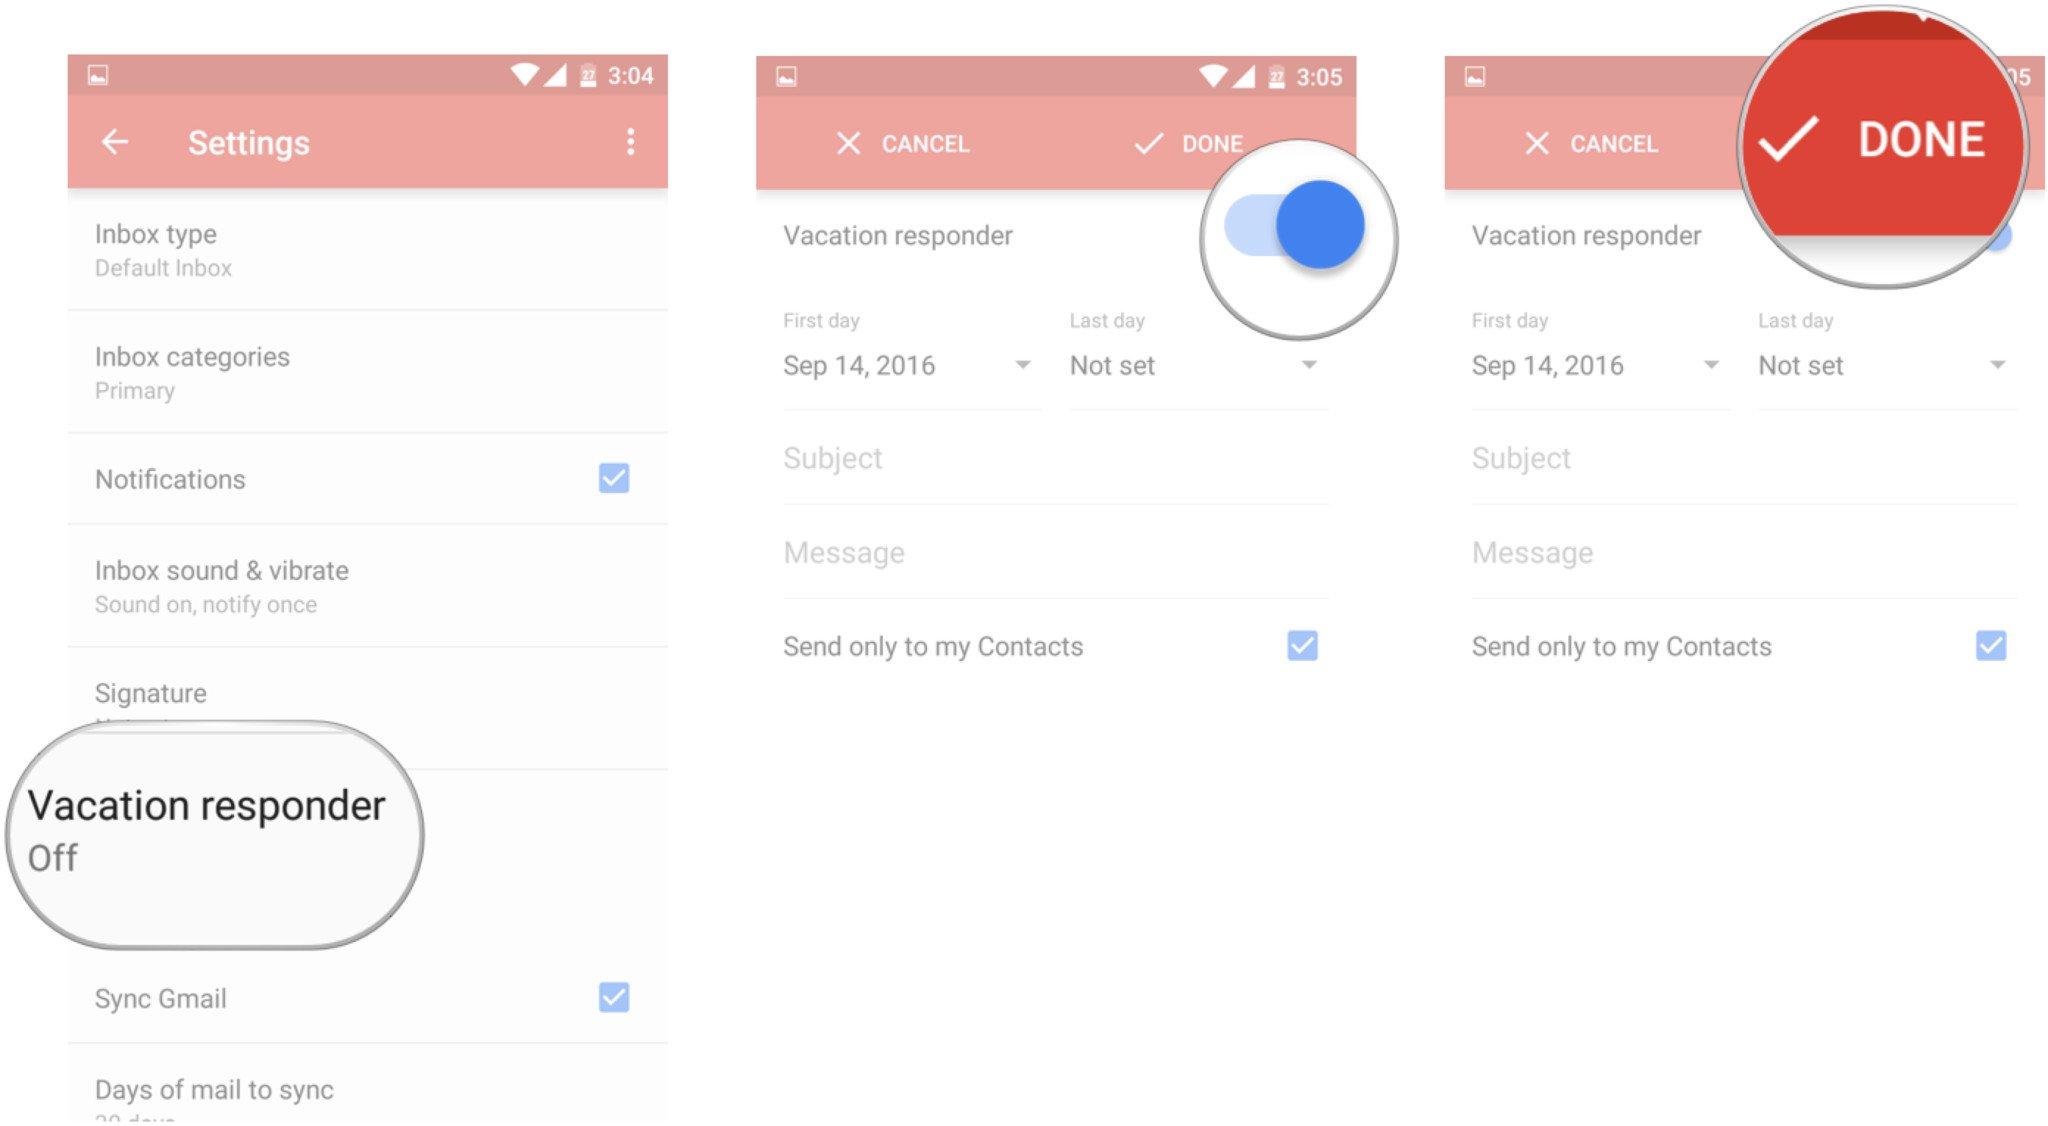
Don't want to look at your inbox while vacationing? Set up vacation responder, and Gmail will automatically fire off a reply to all incoming emails, notifying senders that you won't be available until the set duration. You also have the option of limiting the responder auto-message to those in your contacts list.
- Tap the hamburger menu in the top left corner.
- Navigate to Settings.
Select the Gmail account for which you want to enable an auto response.
- In your account settings, navigate to Vacation responder.
- Toggle the setting to on to start filling out the start and end dates, as well as the body of the message.
Tap Done to enable the feature.
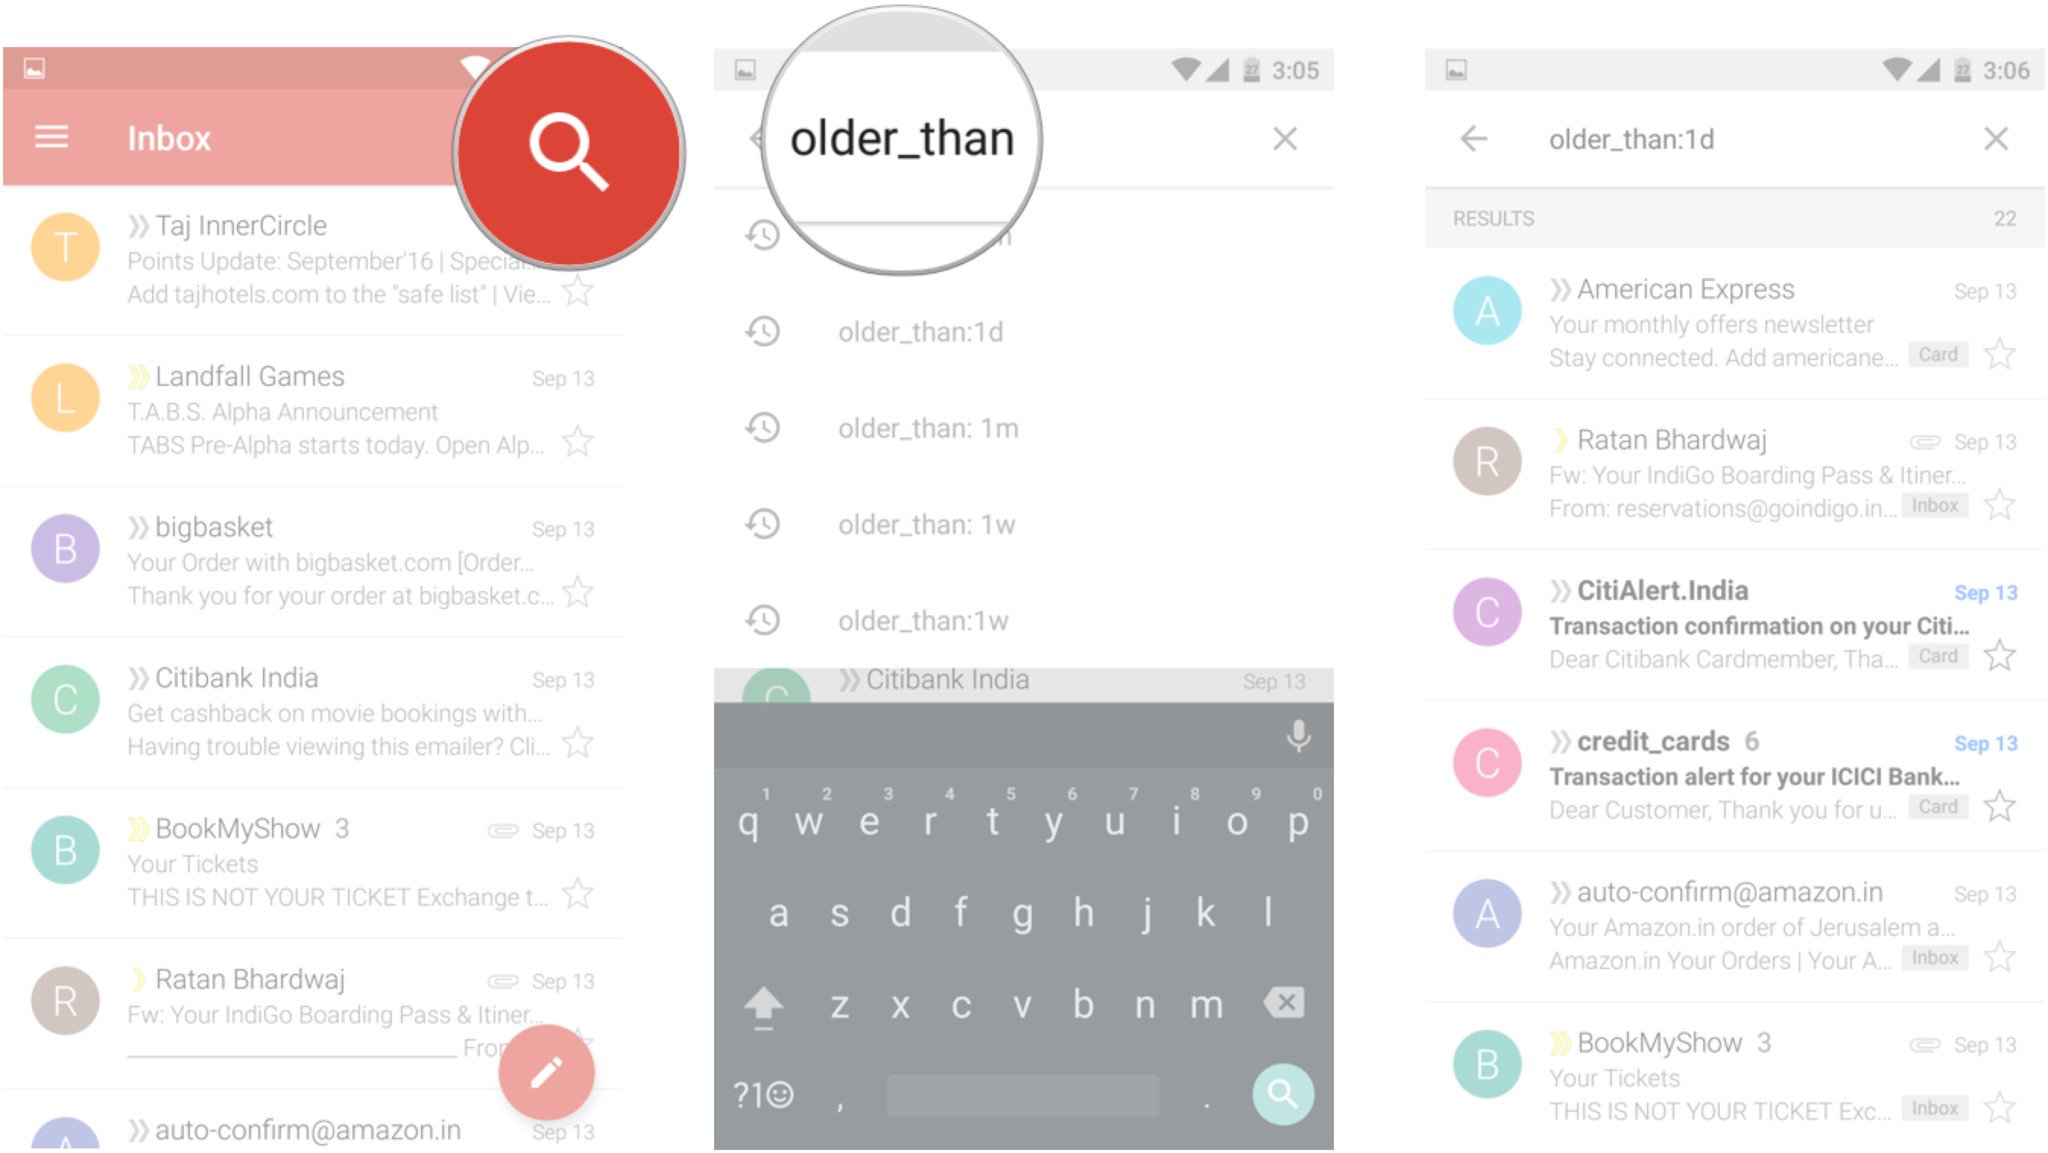
If you're like me and receive hundreds of emails everyday, it's no easy task to keep your inbox uncluttered. Thankfully, Gmail has an excellent search function that comes in handy when you're looking for a specific mail. You can search for mail received on a particular date, filter messages based on the sender, look through mail that only have attachments, and much more.
- Tap the Search icon at the top right corner.
- Key in your search parameter.
Gmail will surface emails that match the query.
If you're interested in seeing all the parameters available, here's the full list. Labels and filters offer an easier way to categorize emails, but both features aren't available in the Android app. You'll have to use Gmail on the desktop to create filters and labels.
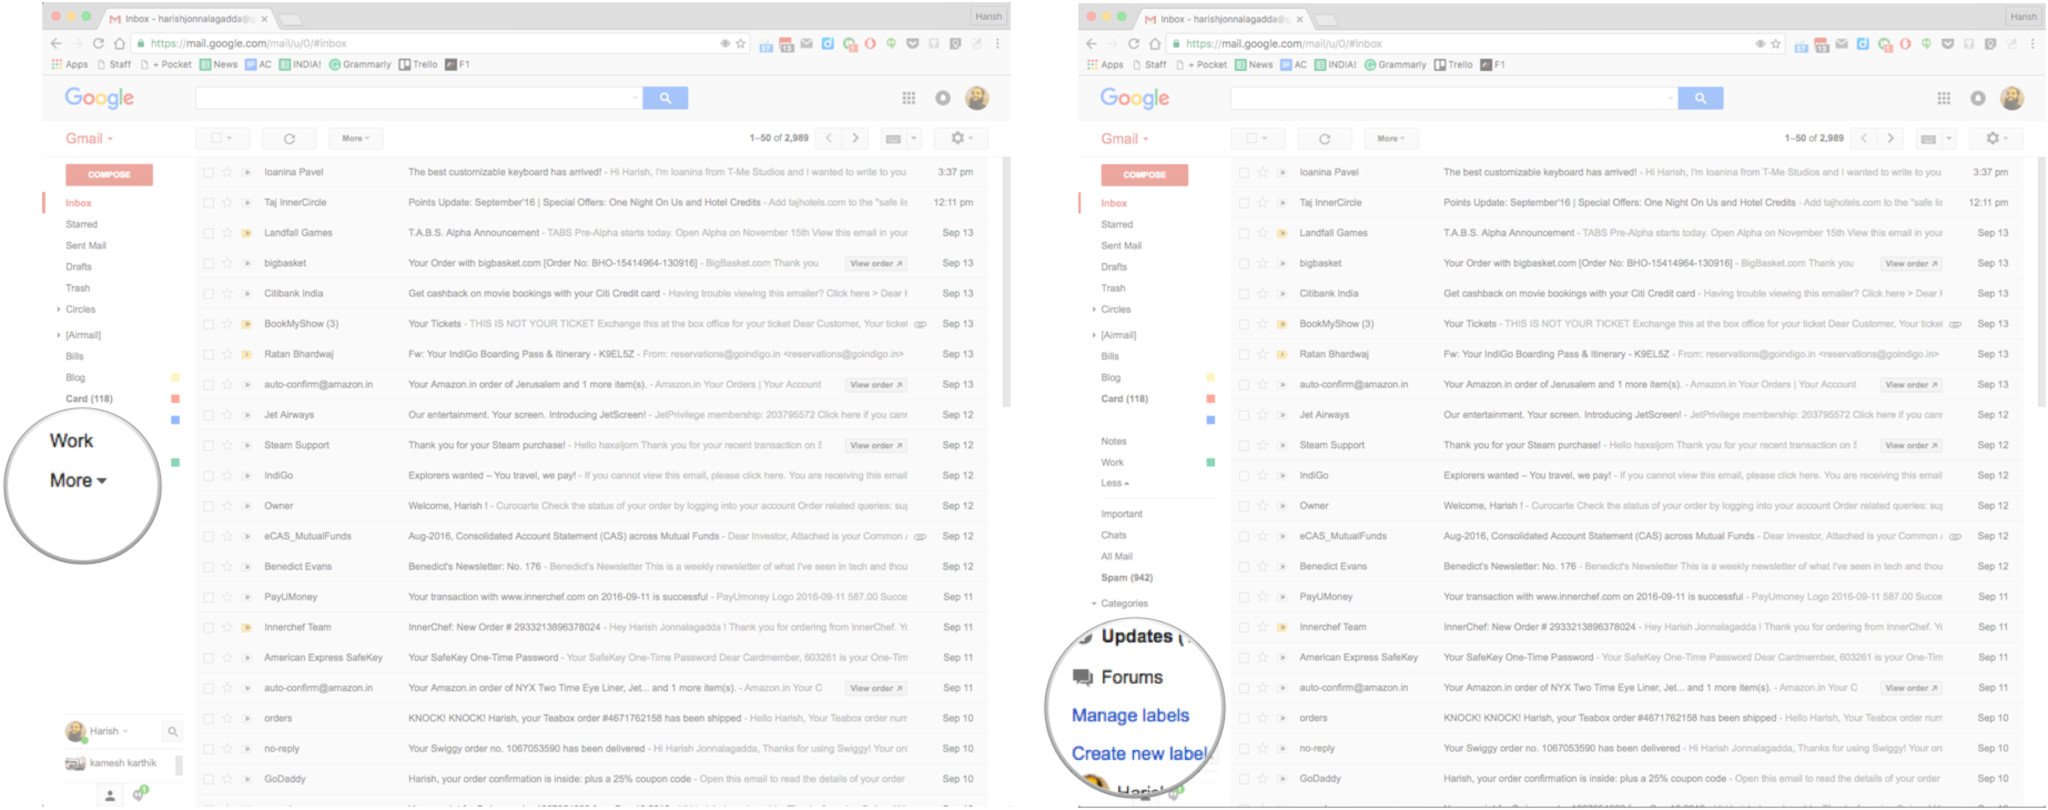
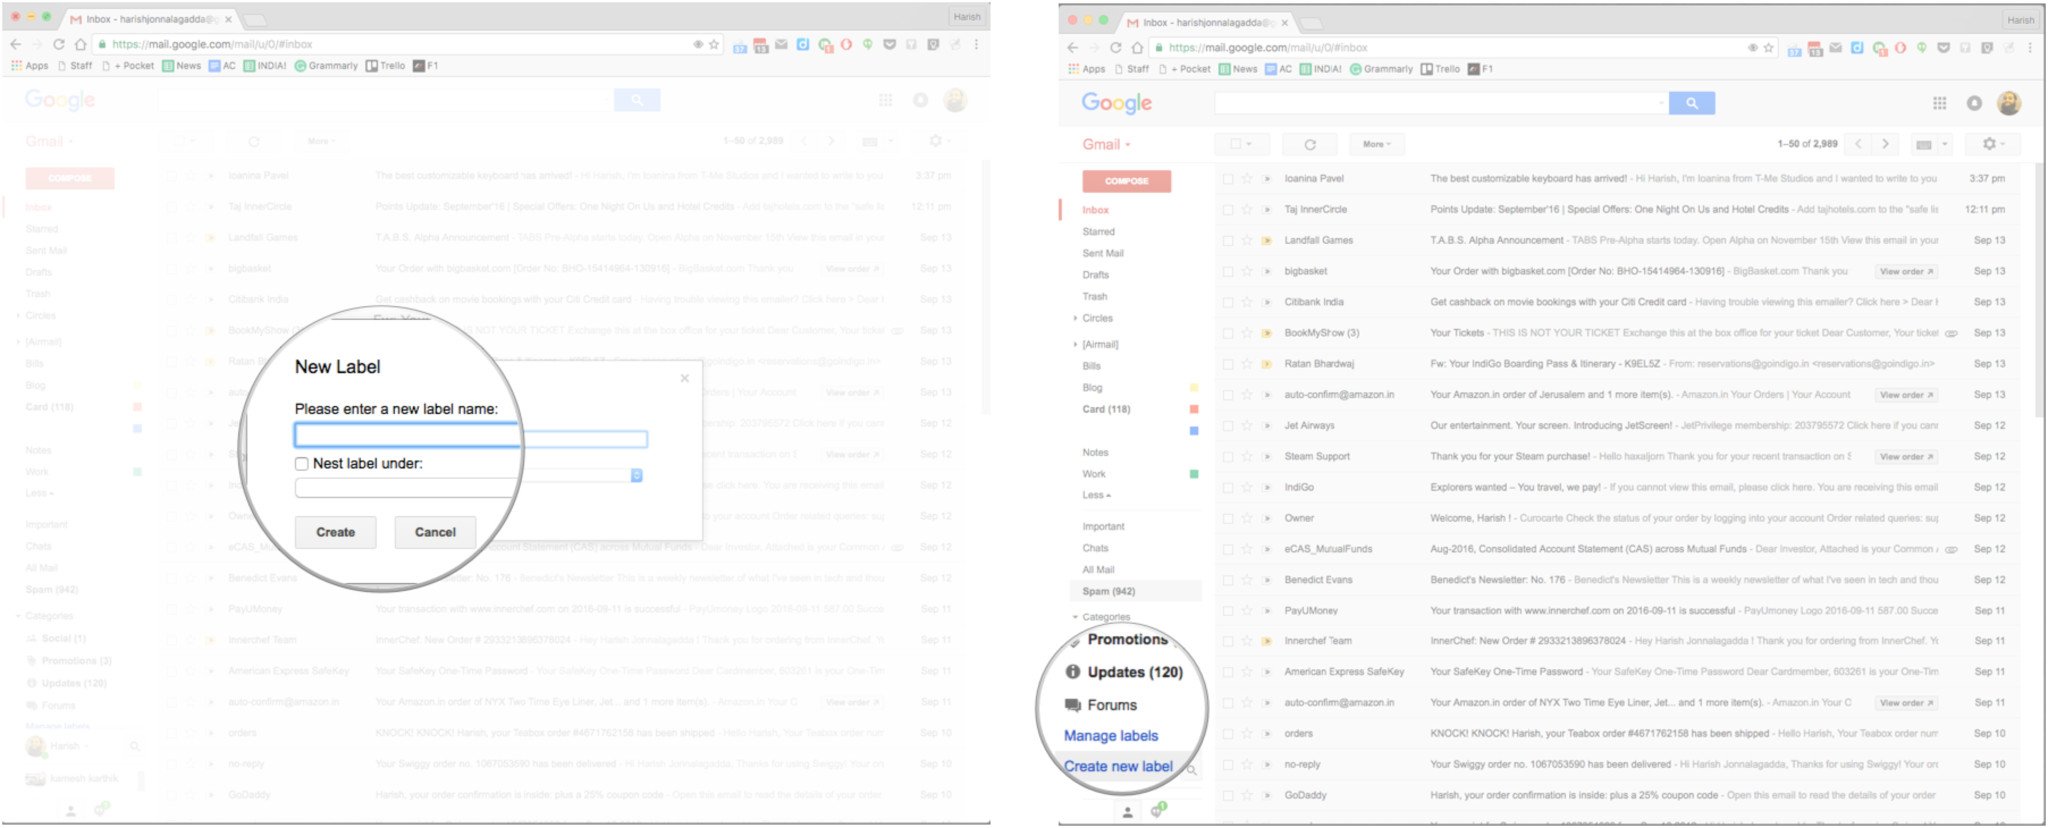
How to create labels in GmailLabels offer an easy way to organize your inbox clutter. You can create an entire label hierarchy using Gmail, nesting sub-labels under a parent label for more effective email management. For instance, you can create a label called Bills for organizing all purchase receipts, and set up a sub-label called Google for all purchases made on the Play Store and other Google domains. For now, you can only create labels from the desktop client, as the option isn't available on the mobile versions. Here's how to quickly set up and manage labels.
- Open Gmail's web interface by visiting gmail.com.
- In your inbox view, click the More button from the left pane.
Select Create new label to make a new label.
- Enter your label name.
- If you're creating a sub-label, Select the checkbox next to Nest label under and tag a parent label.
You can manage your labels from the Manage labels section.
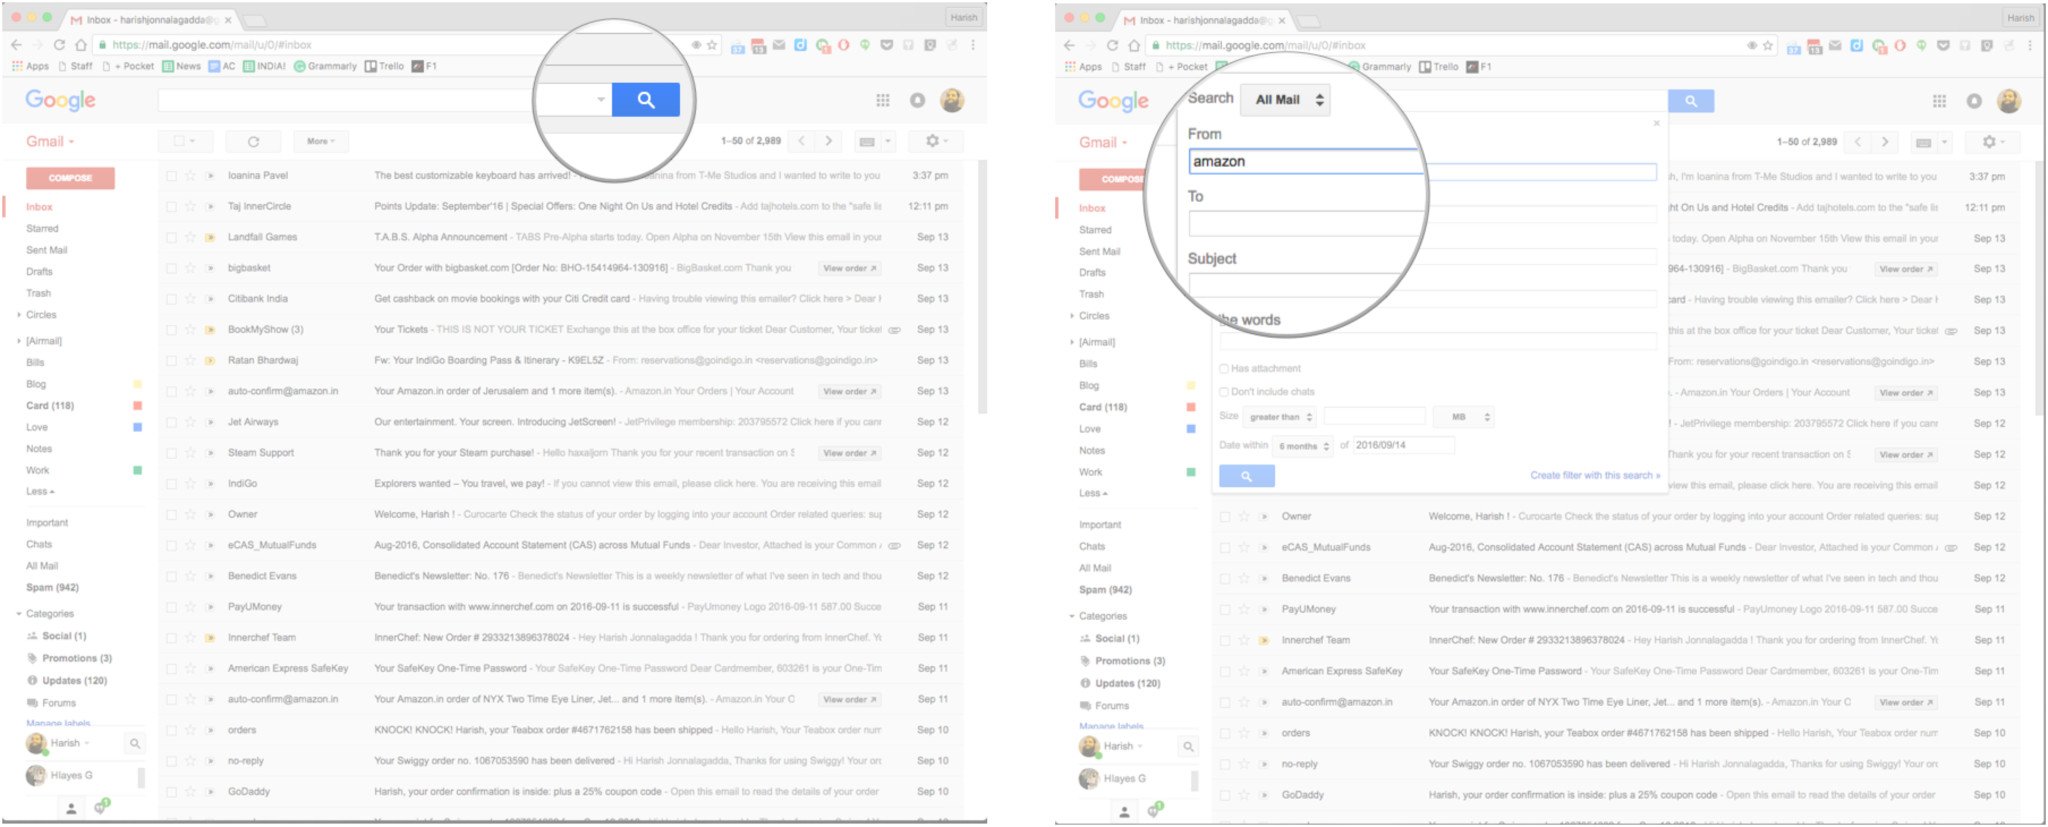
Filters allow you to categorize your emails, giving you more control over your inbox. You can create a filter to automatically forward emails from a particular sender to a label, create rules for mail that have attachments, specific words, and so much more.
- Open Gmail's web interface by visiting gmail.com.
- From the search bar at the top, click the Down arrow.
Set the rule for your filter. In this instance, we're going to archive all emails from Amazon.
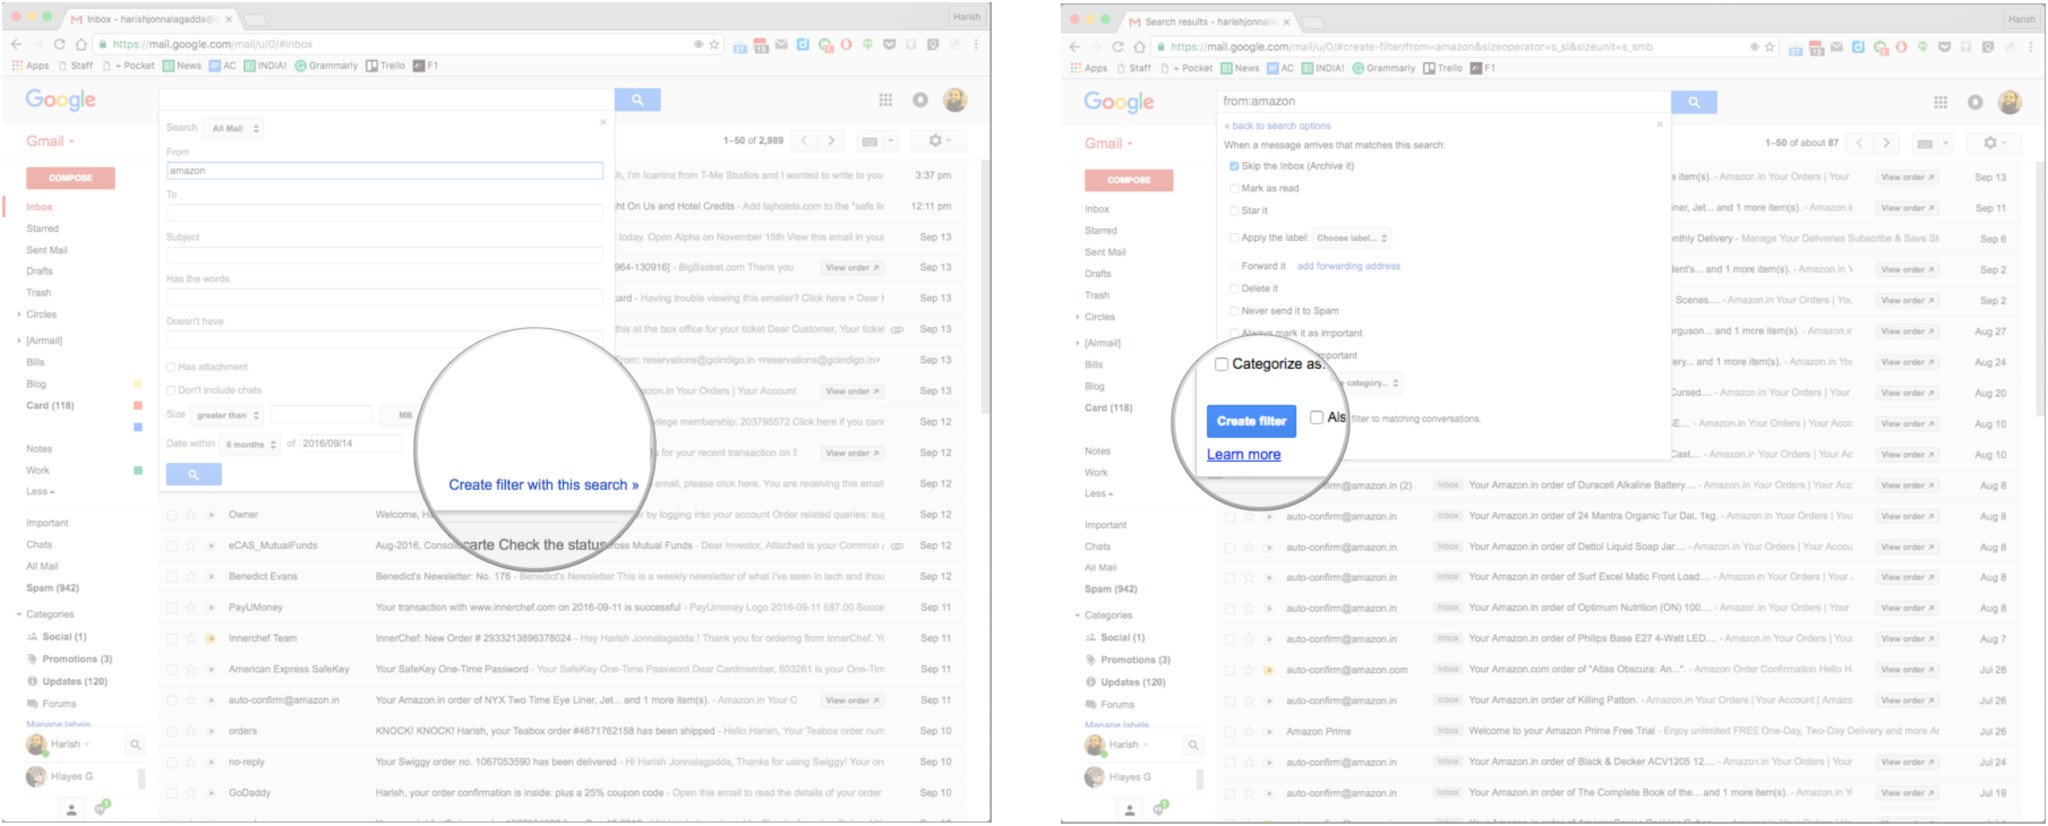
- Once you set your criteria, click on Create filter with this search.
Choose your desired action from the list of options available.
Another way to filter messages is by creating an alias account. Add + after your Gmail username to create an alias that will forward all mail to your original account. For instance, if your username is doctorwhofan89@gmail.com, you can add doctorwhofan89+subscribe@gmail.com as an alias, and all mail sent to that account will be forwarded to your primary username. You can create alias accounts to subscribe to newsletters or promotions, and set up a filter so these messages automatically get sorted into a particular label.
Other mentions- Gmail doesn't parse dots in the email address, so a username like doctorwhofan89@gmail.com is the same as doctor.who.fan.89@gmail.com.
- You should probably start learning Gmail's keyboard shortcuts. They work on the desktop as well as the Android client, when paired with an external keyboard.
- If you're using Gmail on the desktop, it's time you enabled Undo send. The feature is more useful than you think.
What are your best productivity hacks for Gmail? Let us know in the comments.
Update: Updated in October 2017 with details on new Gmail features.

