A DIY Case Study: Building a Fancypants Detached Studio
 About three years ago, my family was happily living in a comfortable, mortgage-free house. There was more than enough room for everyone, it was in a walkable neighborhood, and thanks to some unexpected boosts in our family income, life was more affordable than ever.
But suddenly, perhaps due to some combination of a romantic whim* and the quest for constant optimization, we decided to downsize to a house that was about 50% smaller.
While the above-ground space only dropped by a couple hundred square feet (from 1734 to 1532), this move also cost me my nicely finished basement, a warm dry attached double garage, a garden shed, plus a nifty "tiny house" building I had built out back. The total pain was thus much larger: my almost-3200 square feet of dry indoor space was cut down by more than half.
I use the word "my" because in our family, I really am the main consumer of space. While my share of bedroom and closet space is minimal, I am responsible for a bulky drum set, too much audio and computer equipment, most of the bikes, and of course the whole Confused Renaissance Man's set of tools for working on houses, gardens, metal and electronics. And of course, the accompanying materials and salvaged scraps are even bigger than the equipment itself. I'm a living contradiction because in some ways, being a Maker is the opposite of being a Minimalist.
So, moving to this new house came with one condition: I could survive the compression if I could at least build something about the size of a garage - to function as a place to work, think, create loud music of questionable quality, and spread out my big messy projects.
Thus, before even signing the contract to buy the place, I checked with the city's building department to make sure I could squeeze this future building legally onto the lot. They approved the idea, so after getting the main house mostly built, I broke ground in April 2016 to start building The Studio.
Sometime in the fall of that year, I declared this new Mancave mostly done, and this is in fact the first full article that I will have typed inside the structure. Thus, I thought it would be the perfect time to share some of the decisions, numbers, and lessons learned from this project.
After all, nearly every home buying quest brings up the question: "Could I add extra space onto this old house? If so, what would it look like and how much would it cost?" - Often the best-located houses are in the older and more central neighborhoods, built during an era when a family would happily squeeze into 800 square feet and share a single bathroom. It's a noble goal if you're tough enough, but for those of us who prefer a fancier pad (myself included), a few modifications can make all the difference.
So here's a rapidfire recount of the process I went through to build the Studio:
Design:
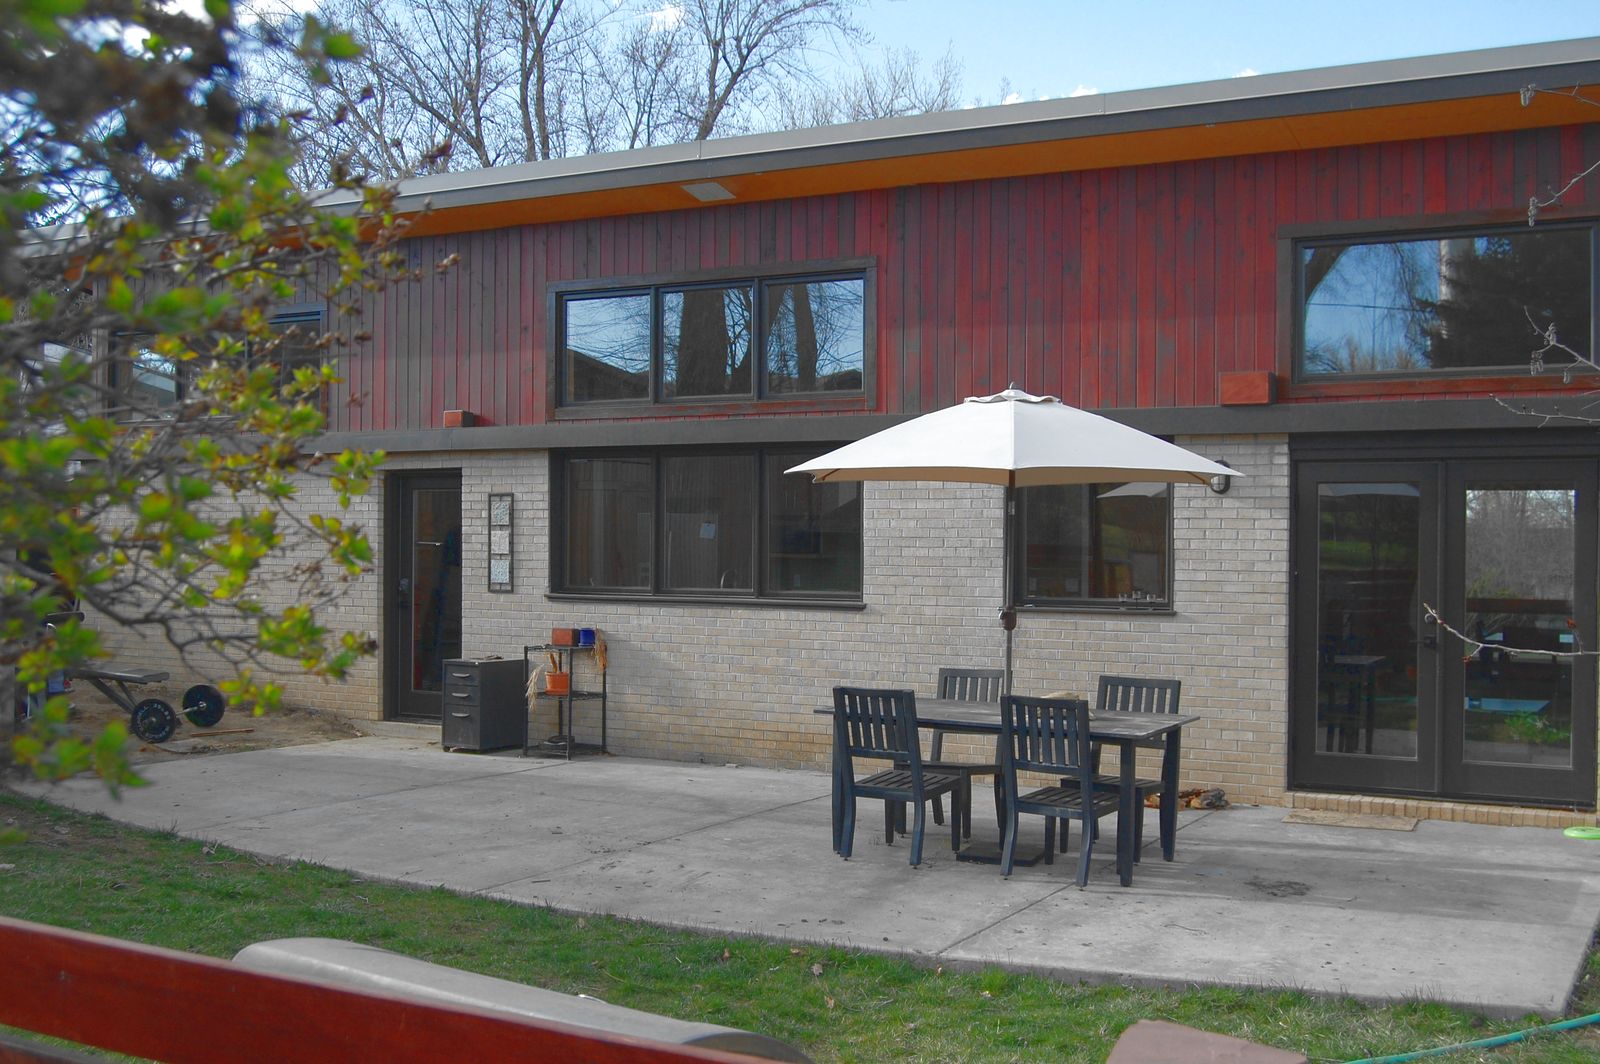
The back of main house (always in progress), as it looked in early 2016. We wanted the studio to go along with this basic style.
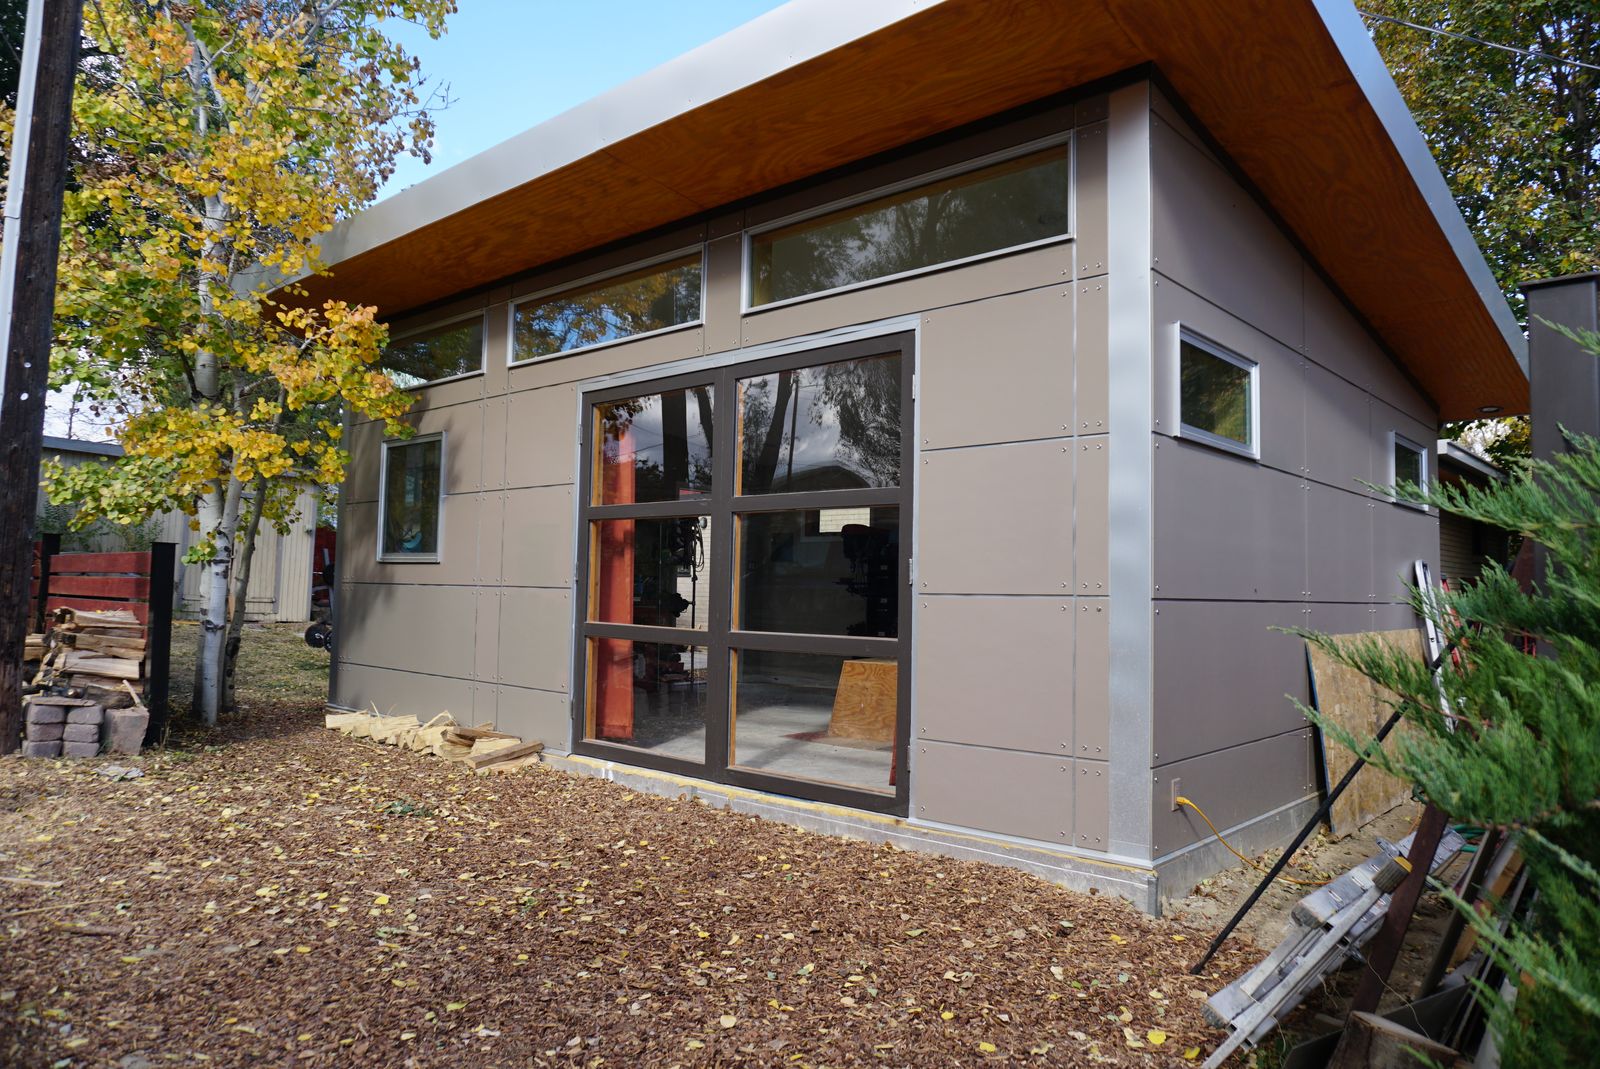
I wanted something with similar style to the simple midcentury modern lines I stuck with for the main house: a single-plane roof with substantial overhangs, and big windows on the South side to let in the sun. After doing some sketches, we happened to find a local kit-building company called Studio Shed that offered almost same design. The benefit of a kit is that all the materials come in one package, which saves a load of shopping and ordering work, plus the wall segments come partially pre-assembled.
I weighed the convenience of the Studio Shed prefab kit against the extra cost, which was fairly high. But I still ended up buying the kit in the end, partly as an experiment to report on the prefab experience to you, and partly because I am trying to value my time more highly these days. The purchase would eliminate most of the boring administrative work: shopping for materials, getting quotes and placing orders, coordinating with a structural engineer, and getting materials to my building site.
Since extra money will no longer help me these days, it helps to take money out of the decisions and think about where time would best be spent. So I bought something called the "Summit Series 16 x 22" with a few nice customizations.
Layout and Digging:

This decision went the opposite way of the Studio Shed kit purchase: since I had never laid out a foundation, dug the actual hole, created large concrete forms or built a complex rebar structure, I decided to do all this stuff myself so I could learn a few more new trades.
I used tape measures, plus the existing lot survey and structures to figure out where to pound in stakes and pull some tight strings. Once everything was verified, I used bright orange ground marking spray paint to clearly define my digging lines.
Then the fun part began: I walked down to the local equipment rental shop and inquired about how a man might go about renting an excavating machine. It turned out that they'll lend one out to anybody, as long as you've got the money. Why did I wait over 40 years to learn this amazing thing about our country?
I only needed a 3 foot deep trench with roughly 16"^3 width, and it turns out that even the smallest digger can dig down to 8 feet, so I rented a John Deere 17G. Rental rate is a little under $200 per day, but you also need to transport the 3800 lb machine to your house. Not owning a heavy equipment trailer, I paid the shop an extra $80 for drop-off and pick-up service. With taxes and fees it was around $300 in total.

Note: I had never driven an excavating machine before. But it's just like a simple video game with a few levers to control the joints: three for the arm, two for the treads, plus one lever for the body swivel and a final one to control the small but surprisingly useful bulldozer blade. I was able to get a pretty straight, tidy foundation hole (really more of a "footing trench" in this case) in only a single day of work. There was plenty of time to spare and the machine burned through less than two gallons of diesel ($5) over the course of the day.
After digging the hole successfully I taught my son to use the machine and he was able to load the 6000 pound dirt pile nicely into an open-top trailer for transfer to our front garden.

I'm saving this picture in case there's ever a future dispute about me being the Best Dad Ever.
After the machine digging, I set the strings back up and went back through with a shovel to fine tune the depth and positioning of the trench. My son made a nifty timelapse video of the process and even wrote some music for it - watch it on YouTube if you like.
Forms and Rebar
This was a great challenge for me, because precise foundations are inherently tricky: you have the imprecise medium of rough soil, combined with heavy wood or steel forms and reinforcement bars that are hard to work with. And all this needs to withstand the force of a 30,000 pound liquid concrete delivery that must be distributed and smoothed quickly as soon as it arrives. But the end result must be precise to within an eighth of an inch, and dead level across the span of your entire structure. As a beginner, I had to invent various shims and jigs to make the adjustments. It was particularly fun to figure out how to bend and weld up a complex 3-d mesh of rebar to match the structural engineer's specifications (and pass an inspection!):
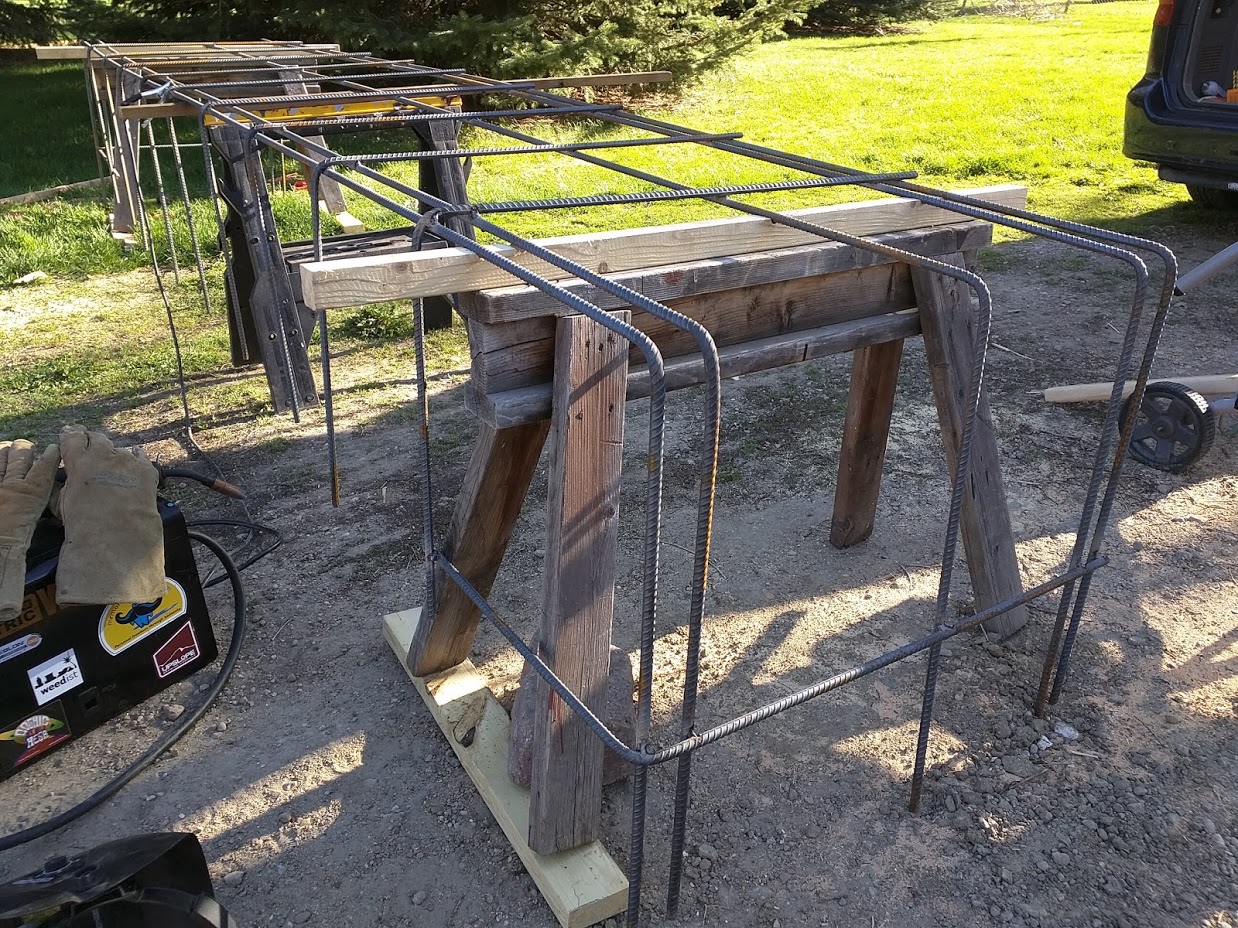
One of the four overlapping walls of rebar that I had to create.
A builder's transit level (borrowed from a friend) was absolutely essential for getting the form positioning correct, and lots of fun to use as well.
I put some rough timelapses on YouTube of these stages as well: building a form wall, and installing it alongside the other three walls.
In the end it looked like this:
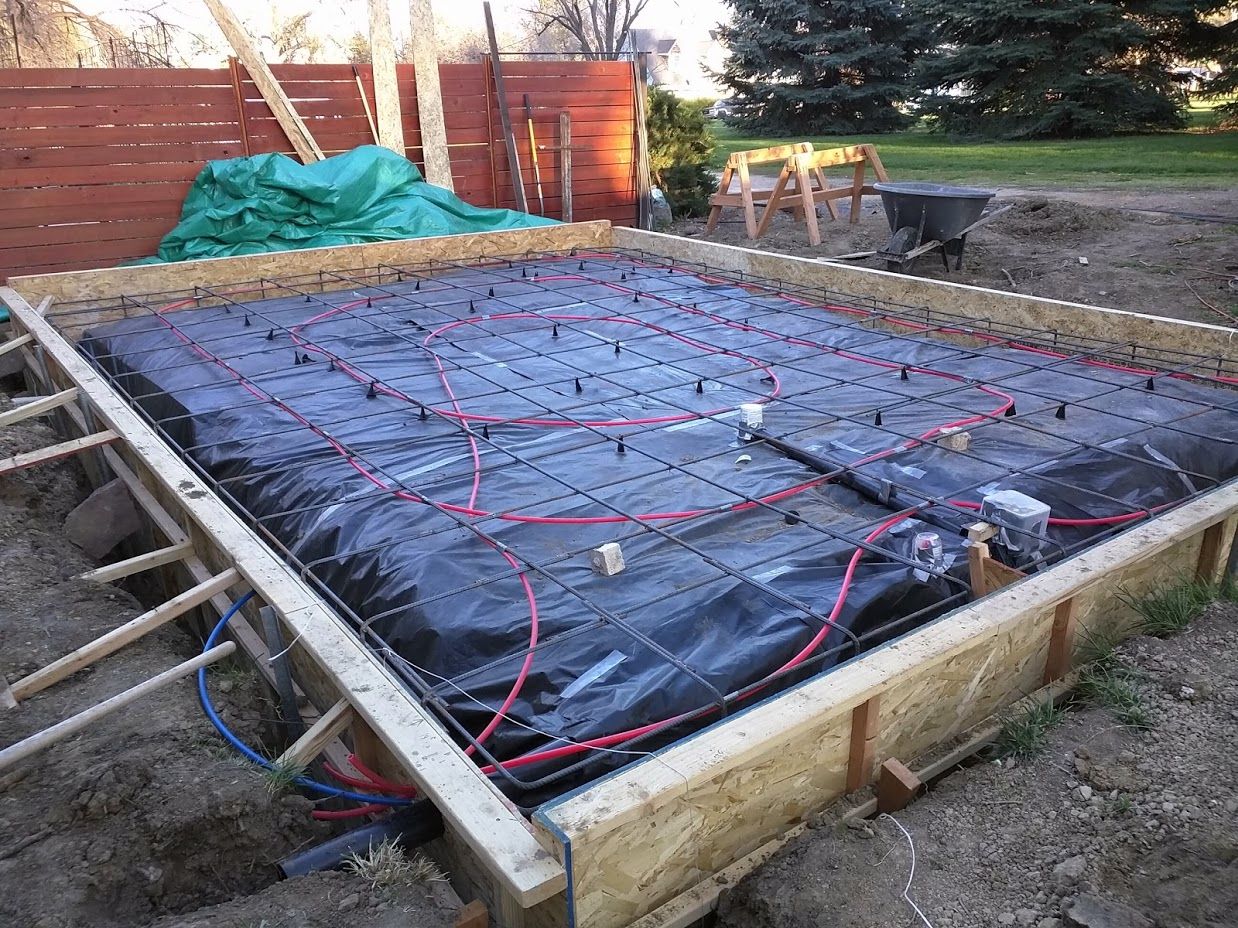
Here is the final form, filled with rebar, radiant heating tubes, and even rough-in plumbing for a possible future small bathroom just in case. Note my haphazard reinforcement to compensate for overly flimsy forms. In the future I would make them more like walls: full 3/4"^3 plywood screwed to full studs on 16"^3 centers. You can always unscrew and reuse the wood later, as I did with all this stuff.
Pouring a Truck Full of Cement
Concrete is an other dark art that is worth learning. Think about it: it's liquid stone that can be formed into any shape, then can last for hundreds of years with no maintenance once it cures. Yet it costs only 5 cents per pound if you buy it in bags, even less if you order a truckload for delivery. Shortcut: ask for "4000 PSI mix with a 6"^3 slump, fly ash added to slow curing time." You order it by the cubic yard and each truck load holds 10 cubic yards, so you can do the math in advance so you sound smarter on the phone.
My foundation and 6"^3 thick floor slab required about 15 cubic yards worth, which cost me $2176 in total. The base price of $145 per cubic yard was much higher than I've paid in the past, but all the local companies were in that range - blame it on the building boom.
This was my third large concrete pour. It's a fun, intense type of work. The basic procedure is to recruit at least three friends, work with them to fill the form uniformly with the truck's chute plus some wheelbarrows, then scrape off the top with a long, rigid piece of metal to get a flat surface. Then work the surface several times over the next few hours with trowels of increasing precision to smooth it out more.
My Youtube timelapse of the part of the second truckload: pouring and smoothing the concrete.
Assembly (also known as Framing)
Once you have a flat, solid slab of concrete that has hardened for a few days, the job is much easier - you're just framing a very small house. Which sounds fairly advanced, but if read a book on the subject or intern with a skilled framer for a day, you'll get the picture.
The Studio Shed kit presented a mixture of advantages and disadvantages in this stage: because the wall segments are bulky and can weigh up to 350 pounds, you really need four people just to unload the delivery truck. Then, you have 10,000 pounds of bulky wall modules, lumber and siding scattered around your yard until you put it all together. On the positive side, the assembly process was slightly faster than manual framing and did not require quite as much knowledge.
Timelapse: Unloading the Studio Shed from the delivery truck
Timelapse: Assembling the walls
The roof comes completely unassembled, so the process was the same as building any other house roof: set the rafters in place and secure them with endless blocking and hurricane ties, heft up the sheets of 3/4"^3 roofing plywood, fire in a few hundred nails, then move on to roofing paper and final roofing material (we used a metal roof in this case, because metal roofs rock).
Finish and Electrical work
To finish out a building like this, you need exterior siding and interior finish materials. This particular Studio Shed came with a very modern kit of painted cement board panels and aluminum accent pieces. The style was something I had never built before, so I feel I learned a few new tricks that I can use elsewhere. The downside is that it was incredibly labor intensive compared to other siding materials - lots of precision required to get it all to work out properly.
Super Insulation for Sound and Temperature
After that, I insulated the structure meticulously with a combination of rigid foam, canned spray foam for the cracks, and batt insulation for the bulk of the building. I used heavy 5/8"^3 Type X drywall on all surfaces for more thermal mass and soundproofing. I even coated the foundation with 1"^3 rigid foil-backed foam insulation before backfilling the hole, to allow the concrete slab to function as an efficient chunk of thermal mass for stable temperatures year-round. The building has gone through a hot summer and now most of a winter, requiring no air conditioning and very little supplemental heat (I set it up as an individual zone on the radiant heat system I built for the main house).
My First Ever DIY Garage Door
With the exterior finished, I was left with a gaping 8"^2 x 7"^2 hole in the front of the building, where they expect you to get a garage door installed. I wanted lots of glass on mine, so I priced out a couple of fancy glass/aluminum garage doors like you see on patio restaurants or fire station garages. The estimates were coming in around $2000 including installation, for a door that was not even well-insulated. I was also concerned about the overhead track cluttering up my precious high sloped ceiling. So I decided to try something new - making my own pair of side-hinged doors from welded 1"^3 x 3"^3steel and thick plexiglas, with a wood interior.
The result was better than I could have hoped: the doors fit very tightly and have not warped at all since I built them six months ago (a huge advantage of steel over wood), and I created a weathertight design much like a standard exterior door. Total cost was $300 and about 8 hours of work. Thermal performance seems great as well - no noticeable draft even on the coldest nights.
A Serene New Life with the Studio
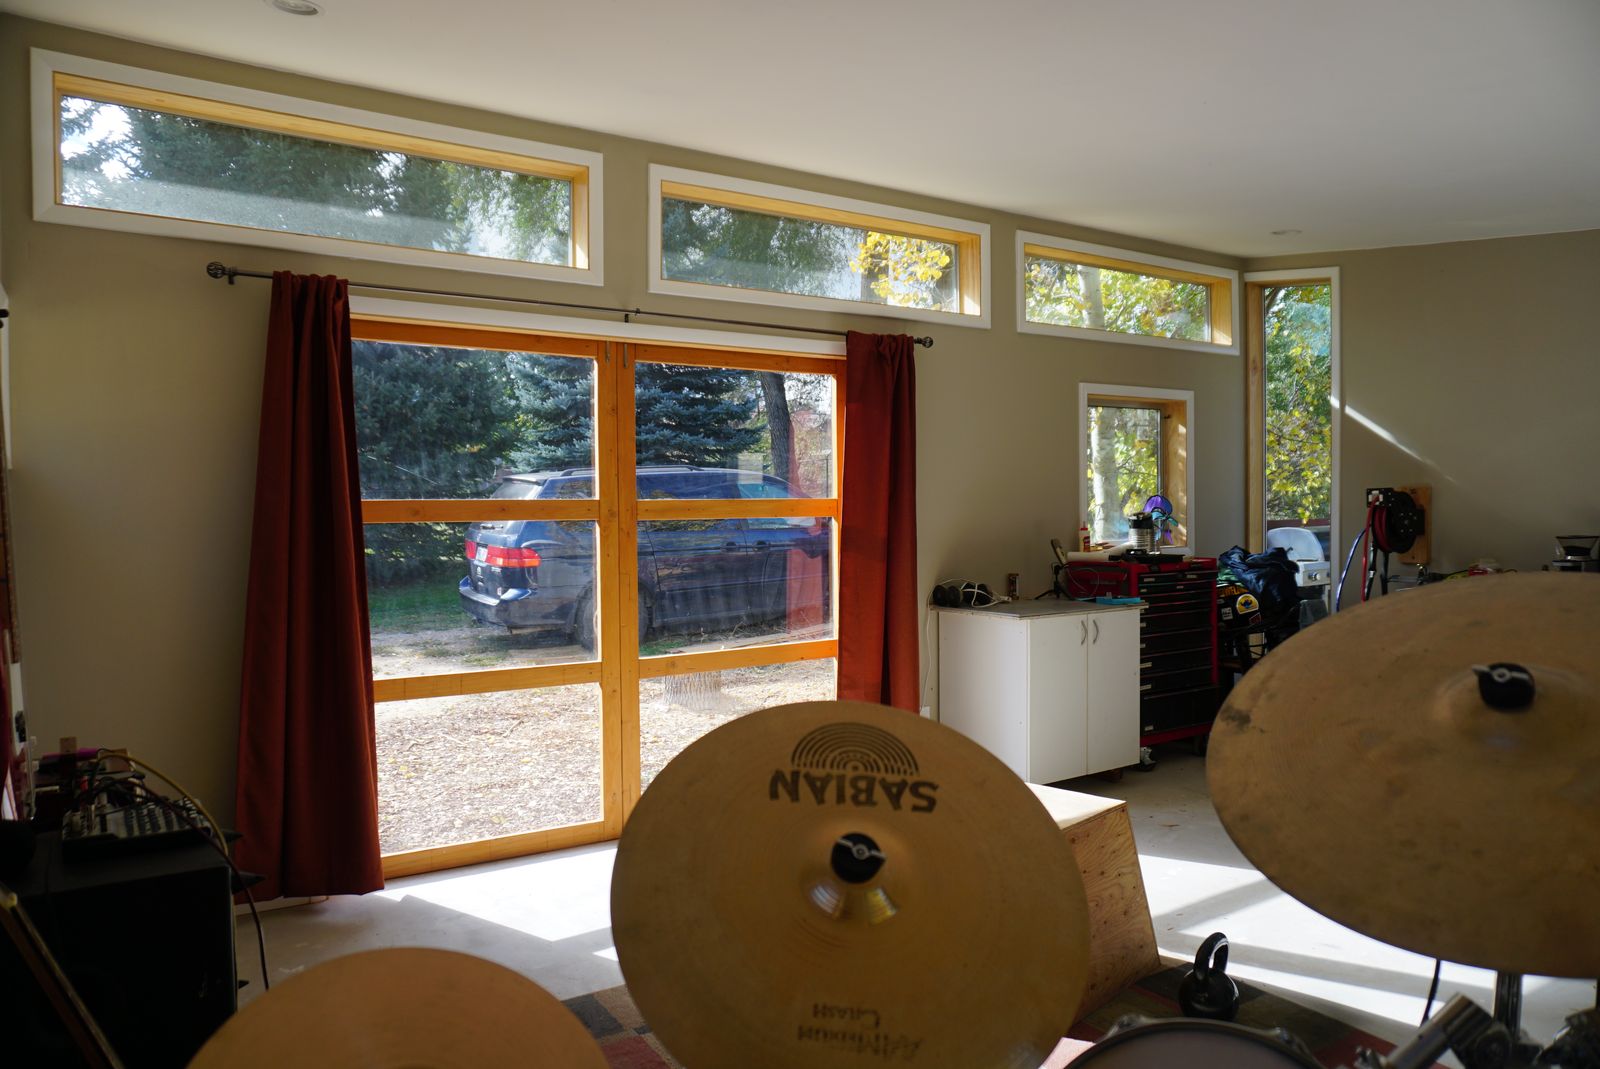
View from the drummer's seat.
The experience of building this thing was worthwhile in its own right: lots of education, Zen-like days of problem solving and hard outdoor labor. From a financial perspective, it's probably a good investment, as I spent less than $100 per finished square foot, while the per-square-foot value of houses in this area is well over $300. This might yield a "profit" of roughly $60,000 when I eventually sell this house. But the real benefit has come from actually putting the thing to use.
Suddenly, I have a warm, dry indoor space in which to roll a snowy mountain bike on a winter night. I also used up some scrap materials to add this seven-bike outdoor garage to the otherwise-unused North wall:
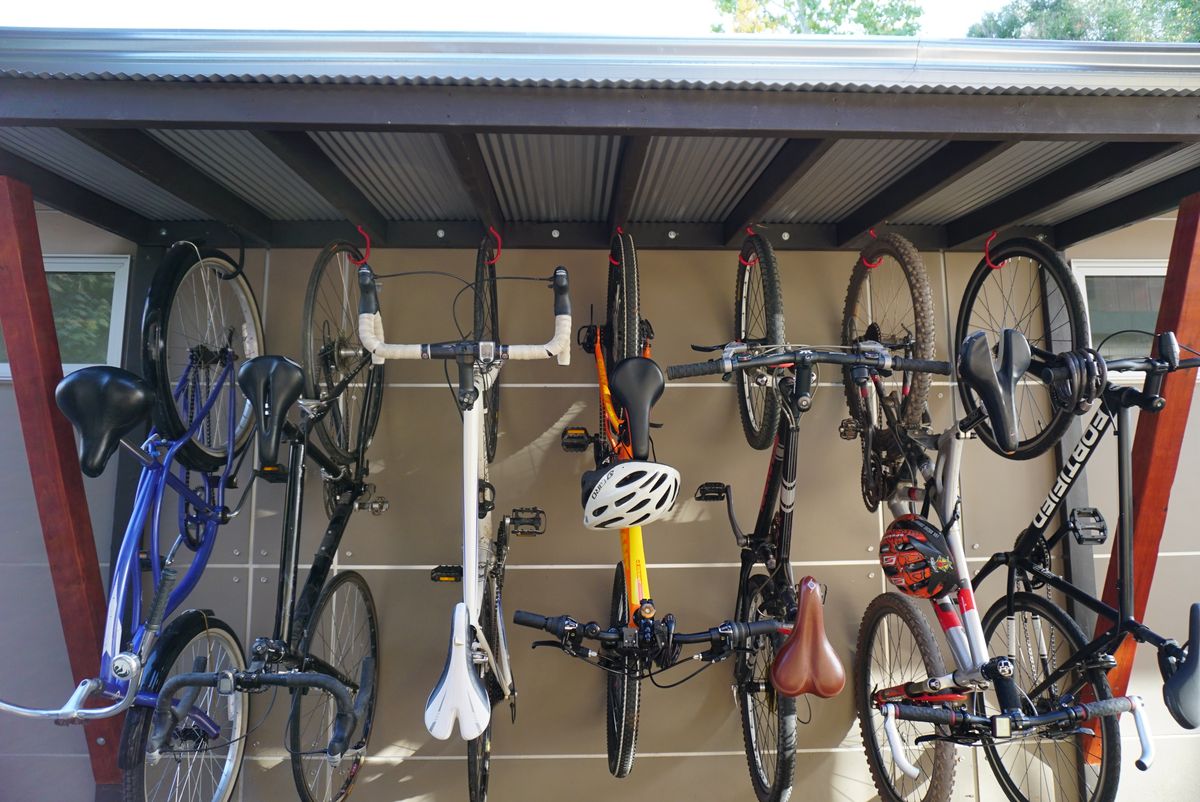
Seven bikes that can now stay dry without taking up precious indoor space.
And an incredibly quiet place to retreat and write or read, when the main house becomes a zoo. And a soundproof place for the newly revived funk band to play whenever we want, without any worry of disturbing family or neighbors. As a result, I've played more music with friends (and even with my son) in the past six months than I had in the previous six years.
By the Numbers: Building a Detached Studio
Let's finish up with a rough summary of typical costs for a project like this in a midrange region of the US , with my spending in the second column from the right.

So in the end, it's about 31 grand and a lot of good hard work, for a building that will pay ongoing productivity dividends and then return more than its cost when it is eventually sold. Overall, building this structure has been one of my happier projects in the last decade, and it's one that I can recommend as an alternative to looking for a bigger house if you need to expand a little.
----
* The whim in this case was a desire to rebuild an old 1959 house almost from scratch, as well as an even-better location: still within walking distance to everything, but also on a quiet circle with a mostly unused public park as the back yard. An extra 1.4 acres of free land, maintained automatically by the city!
Need More Details? If you have specific questions on how this thing was built, or how to make your own, ask them in the comments section below. I left a lot out of this article in order to keep the length reasonable, but we have more space there.