My $3500 Tiny House, Explained

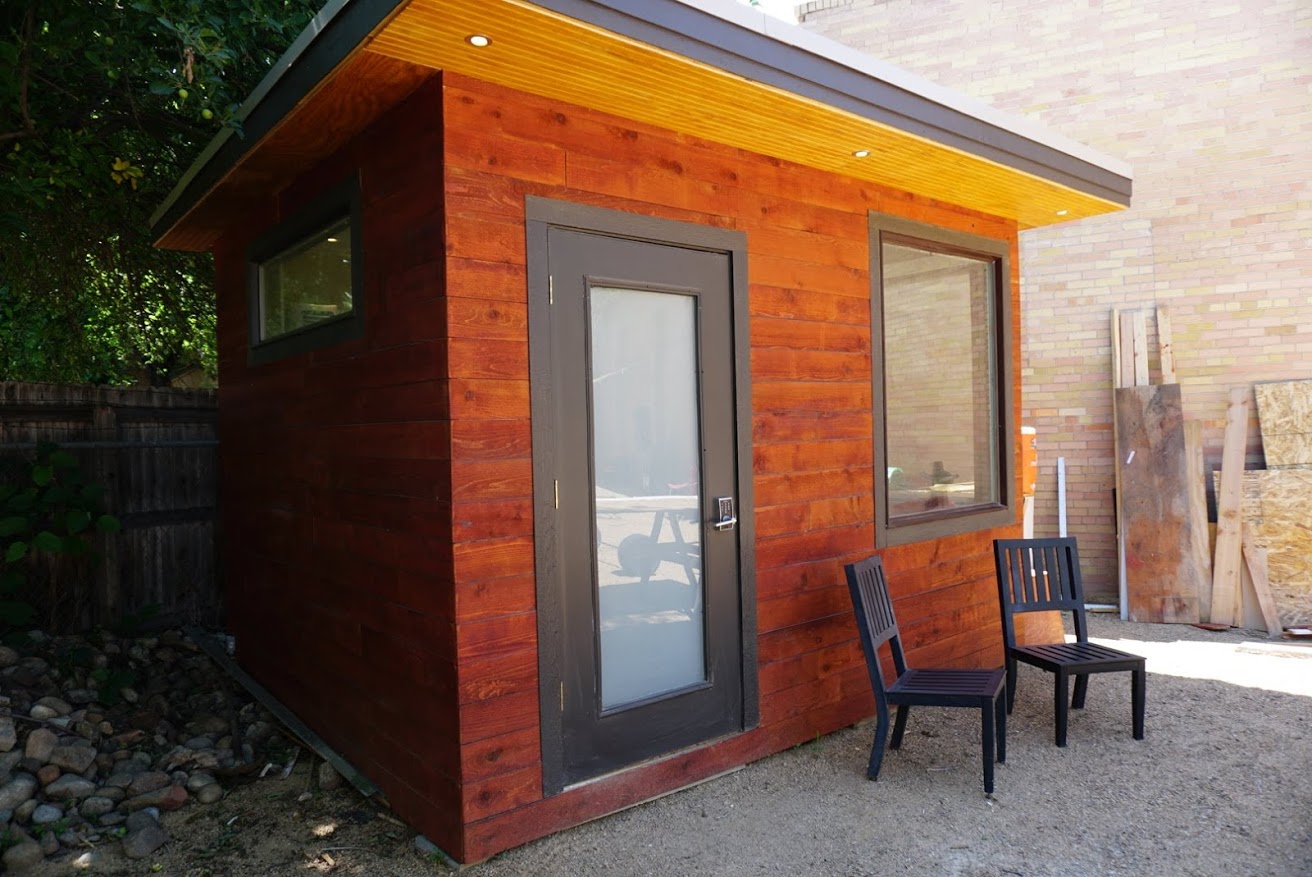
Meet "Timothy", the new tinyhouse-style conference room at MMM HQ.
One of the nicest new trends of recent years is really the revival and rebranding of something very old: the smaller dwelling.
Over the last few months, I have built just such a structure, and it has turned out to be a rather cool experience. In fact, I'm typing this article for you from within its productive new confines.
Technically, it's just a fancy shed. But it is functioning as a freestanding office building, a sanctuary, and would even make a pretty fine little dwelling for one person, if you were to squeeze in the necessary plumbing. It's a joyful place to spend time, and yet it only took a moderate amount of work and less than $3500 of cash to create it.
The experience has been so satisfying and empowering, that it has reminded me how much we rich folk are overdoing the whole housing thing.
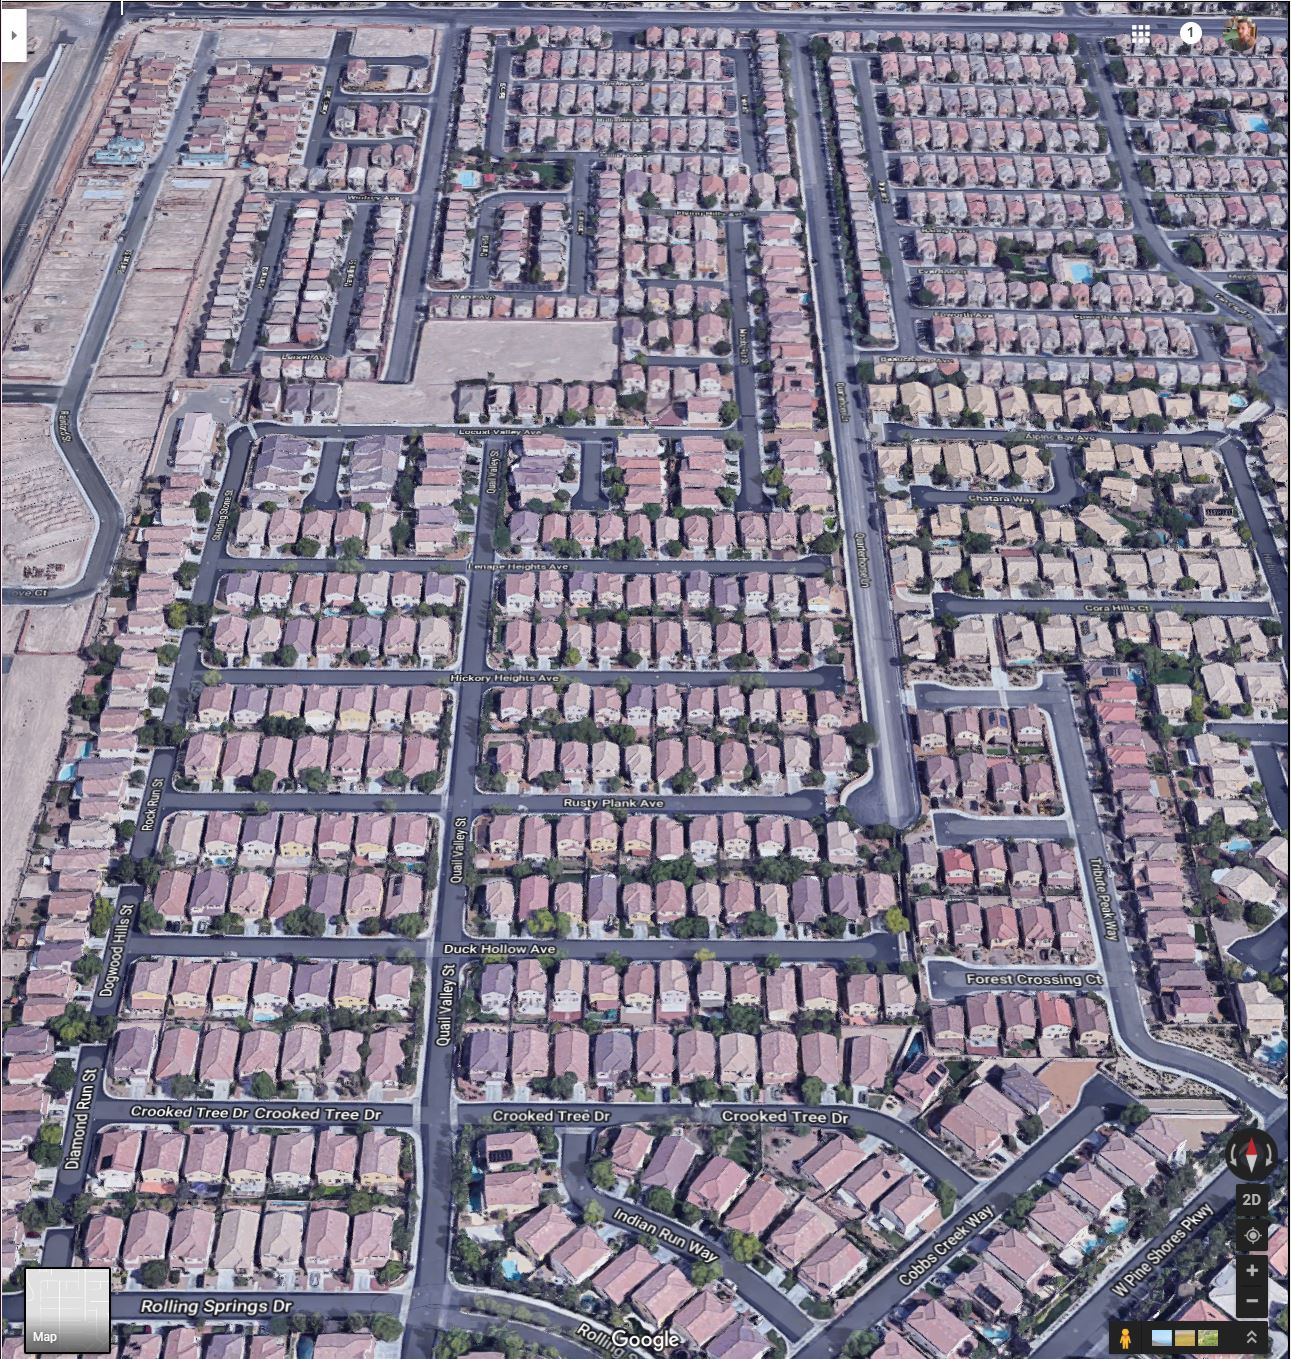
The latest and most distant Las Vegas Suburbs - still expanding (actual screenshot from Google Maps)
For decades, we have been cranking up household size and amenities in response to increasing productivity and wealth. In the 1940s, the typical US household had four people sharing 1000 square feet, or the equivalent of one large garage bay of space per person. Nowadays, new homes average around 2600 square feet and house only three people, which means each person floats around in almost triple the space. We have also started placing these dwellings in bigger expanses of blank grass and/or asphalt, which separate us further from the people and places we like to visit.
The funny part of all this is that we prioritize size over quality. Houses are sold by the square foot and the bedroom and the bathroom, rather than the more important things like how much daylight the windows let in or how well the spaces all fit together. And we settle for the shittiest of locations, buying houses so far from amenities that we depend on a 4000 pound motorized wheelchair just to go pick up a few salad ingredients.
Meanwhile, smaller houses and mobile and manufactured homes have continued to exist, but they have sprouted an undesireable stigma: those things are only for poor people, so if you can afford it you should get yourself a large, detached house.
My Tinyhouse Dreaming
Ever since my teenage years, I have dreamed of casual, communal living. 1992 still ranks as possibly the Best Summer Of My Life, because my brother and I lived a leisurely existence in the utopian garden-and-forest expanse of our Mom's half acre backyard complete with swimming pool, fire pit, and pop-up tent trailer.
We lived at the center of small, historic town, with very little for teenagers to do in the summer besides find a way to get beer, and find somewhere to drink it so we could play cards and make jokes and if we were really lucky, find romance. And in these conditions, Mum's backyard came to the rescue of our whole social group.
People would show up in the morning and just linger and come and go all day, swimming in the pool, grilling up lunches and dinners, playing cards at night or watching movies in the impromptu movie theater I had set up in the old detached garage. There were last-minute multi-person sleepovers every weekend. Leftover spicy bratwurst for breakfast cooked over an open fire in the morning. The fond memories from this early-nineties teen utopia live on in all of us*. So naturally, I have wanted to find ways to recreate that carefree feeling ever since.
According to people who actually study this stuff, the key to a really happy community and warmer friendships seems to be unplanned social interactions: you need to run into people unexpectedly every day, and then do fun stuff with them. To facilitate this, you need to live close enough together that you encounter one another when out for your morning stroll. Smaller, cheaper housing is the key to this, as well as a key to spending a lot less money on isolating yourself from potential new friends.
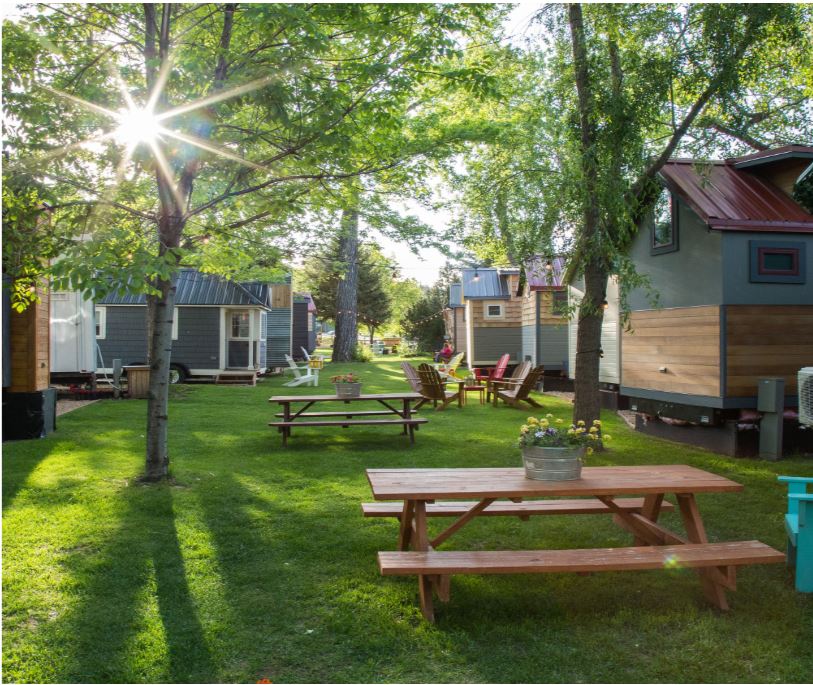
Weecasa resort (image credit Weecasa)
Need a few real-life examples? Right next to me in Lyons, Colorado, someone (I wish it were me!) thought up the idea of creating a resort out of tinyhouses called WeeCasa. Consuming less space than just the parking lot of a normal hotel, they have a beautiful and now highly popular enclave where the rooms rent for $150-$200+ per night.
Two friends of mine just bought a pair of adjoining renovated cabooses (cabeese?) in a Wisconsin beach town, with plans to create the same thing: a combination of a pleasant and walkable lifestyle with fewer material strings attached, and a stream of rental income when they're not there.
Another friend built her own tiny house on a flat trailer platform, and has since gone on to live in a beautiful downtown neighborhood, both car-free and mortgage-free except for a small parking fee paid for stationing it in her friend's back driveway. The monetary impact of making such a bold housing move for even a few years of your youth, is big enough to put you ahead for a lifetime.
Even my neighbourhood of "old-town Longmont" has recently inflated to the point of tiny starter home selling for $500k, for the same reason: people really want walkable, sociable places to live and house size is less important than location. While I'm in favor of this philosophy, I'm not in favor of anyone having to spend $500,000 for a shitty, uninsulated, unrenovated house. So we need a greater supply of smaller, closer dwellings to meet this higher demand.
But that's all big picture stuff. The real story of this article is a small one - a single 120 square foot structure in the back of one of my own properties right here in downtown Longmont, CO. So let's get down to it.
The Tinyhouse Conference Room
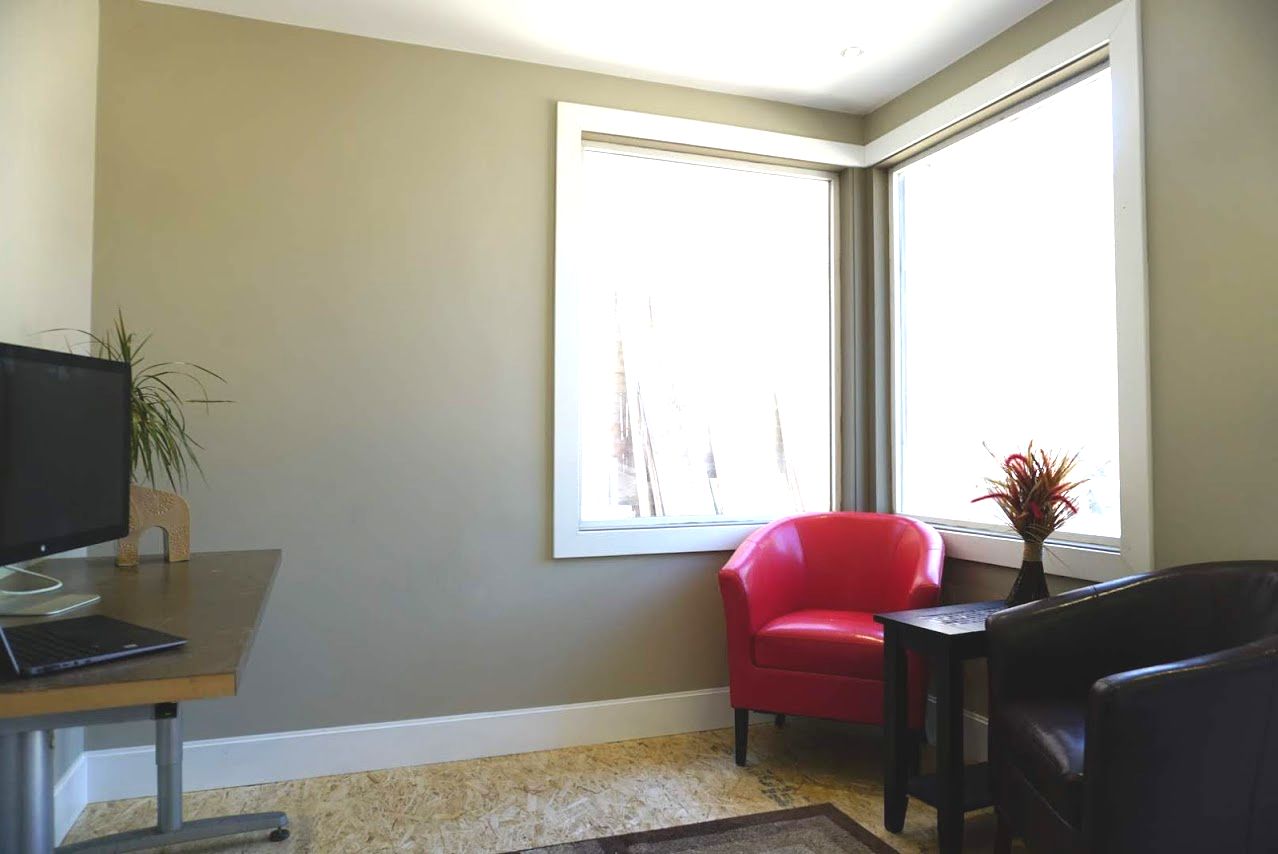
An interior view of our new workspace.
Nearing its one year anniversary, the "MMM-HQ" coworking space has been a lot of fun to run so far. It has been a mixture of quiet workdays, heavy workouts, evening events, and occasional classes and markets. (We have about 55 members and are looking for a few more, so if you happen to live in Longmont click the link above.)
But with only one big room as our indoor space, some members have felt the pinch of needing a quiet place to do longer conference calls or client meetings. So the plan has always been to build a couple of new spaces, and at last I have one of them mostly finished. And I made a point of documenting the whole process so I could share any ideas and lessons learned with you.
What goes into a Tinyhouse?
As with any big construction project, I started with a spreadsheet of steps and materials.
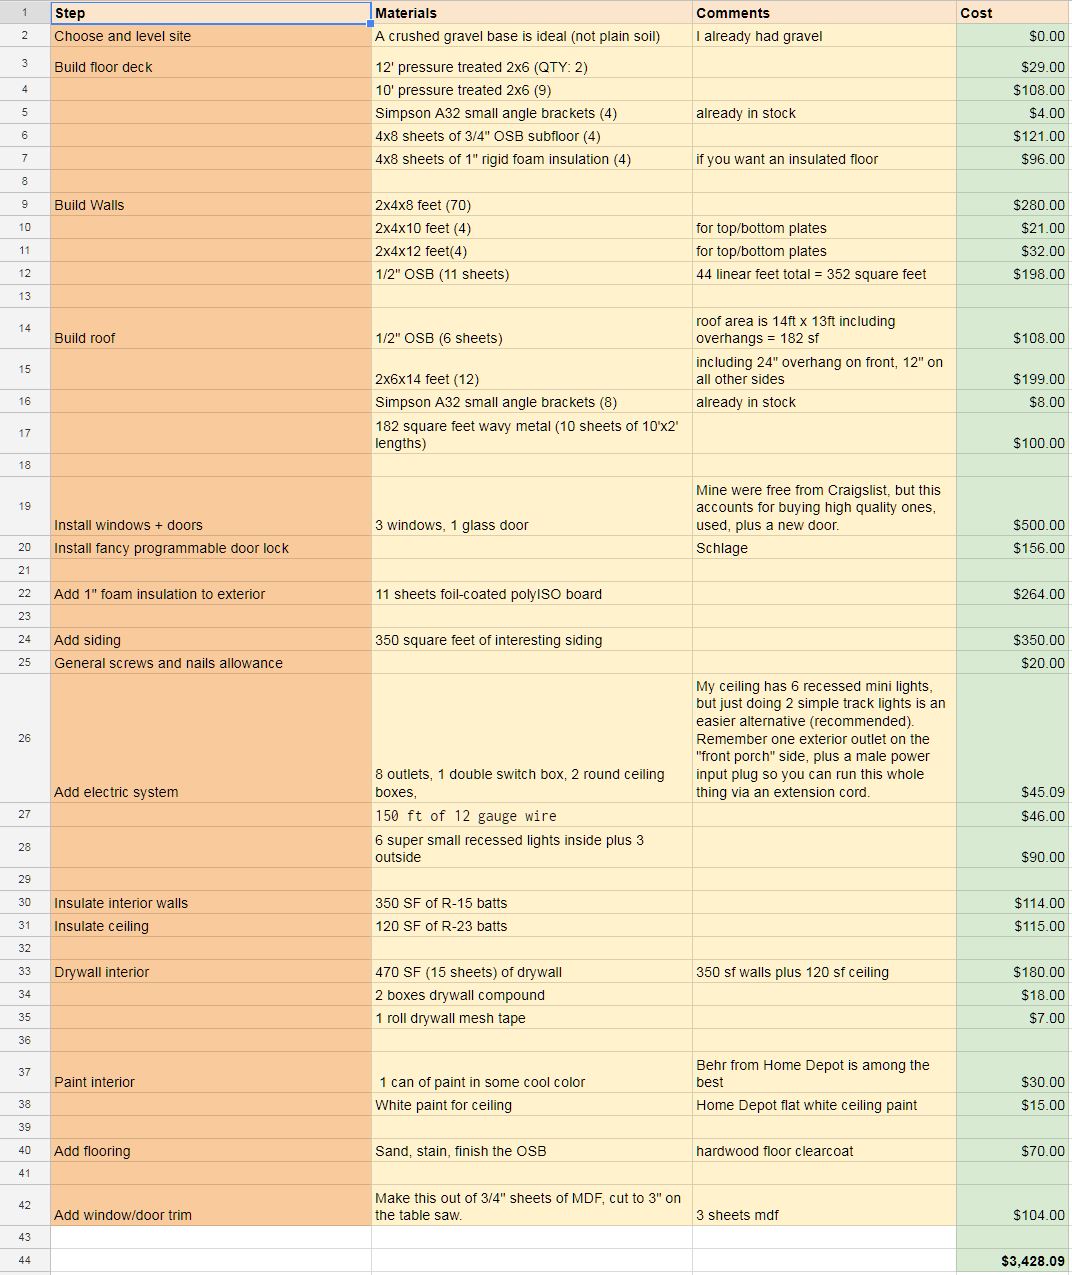
Here's the complete list of steps and materials. You can click for viewing or download an .ods version for tweaking.
To save time, I tried to think ahead and get everything in one order **- most lumber shops will do free or cheap delivery on large orders like this. Of course, I ended up only partially successful and had to go back for missed objects, but I added those to my spreadsheet so your order can be more complete than mine.
At this point, it was just a matter of putting it all together, an effort which took me about 120 hours (three standard weeks) of work, spread out very casually over the past three months. Most of the work is standard house framing stuff, but just for fun we can step through it in rapidfire style right here.
The Super Simple Insulated Floor
Normally when building a small house, you'd dig a hole and pour a reinforced slab of concrete, as I did for the larger and fancier studio building at my main house. But in this case, the goal was fast, cheap and simple. So I just raked out a level patch of crushed gravel, compacted it with my rusty homemade welded compactor tool ("La Cruz"), and then started laying out pressure treated 2i-6 lumber.
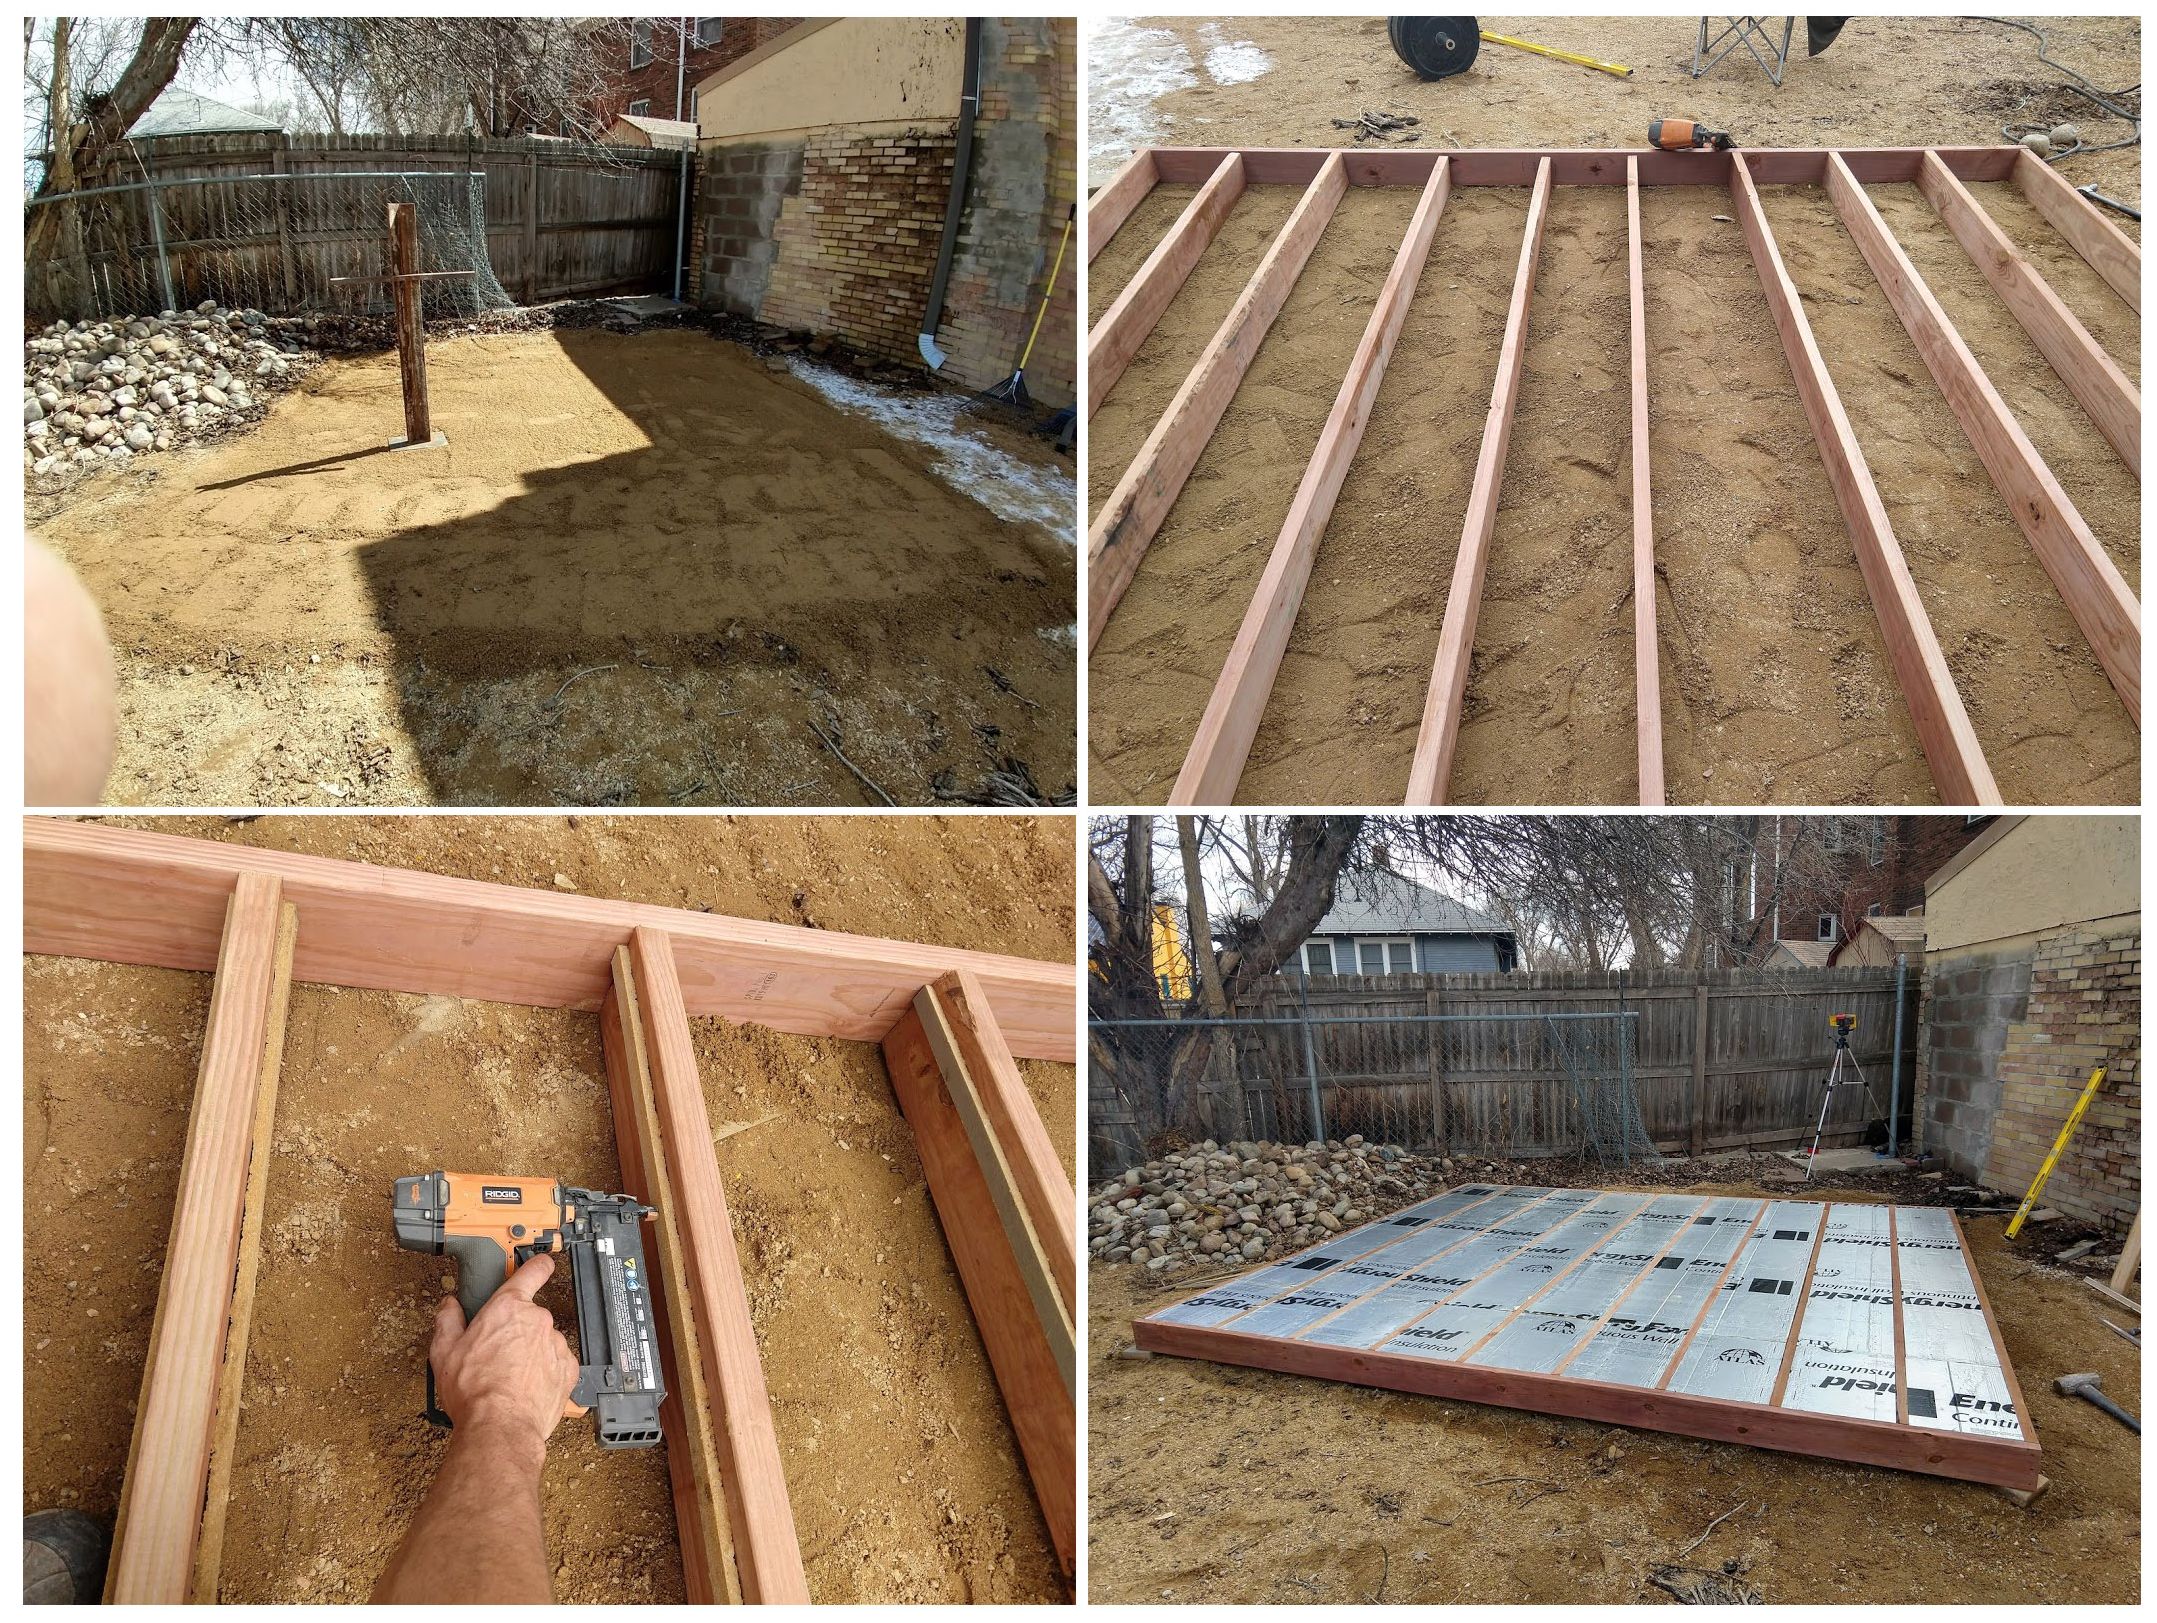
Here's the 12i-10 floor platform. Note the little support rails which allowed me to tightly fit in the foil-coated foam insulation between the joists. Most joints are done with simple 3.25"^3 galvanized framing nails, but I added Simpson corner brackets on the insides of the outermost joists for more strength.
Framing
Once I had those floor joists super square and level (hammering in stone shims under corners and joists as needed), I added a layer of standard 3/4"^3 OSB subfloor and nailed it down judiciously with the framing nailer to ensure a very rigid base. Then started to make the walls.
I used the floor as a convenient work platform for building the four walls. I built them flat and even added the 1/2"^3 exterior sheathing in advance, then tilted them up with the help of a friend or two. This method makes for heavier lifting but higher quality, because you get a perfectly straight and square wall almost guaranteed. Plus, it saves time because sheathing is a fussier job to do on an already-installed wall.
Once all four walls were set up and locked in place, I created the roof frame, which is really just a rather large wall. I did this on the ground, but had to compromise and skip the pre-sheathing step even though it would yield better quality, because we needed to keep it light enough to lift. If I had really strong friends or a telescoping forklift like real framing companies have, doing it all on the ground would have been a big win.
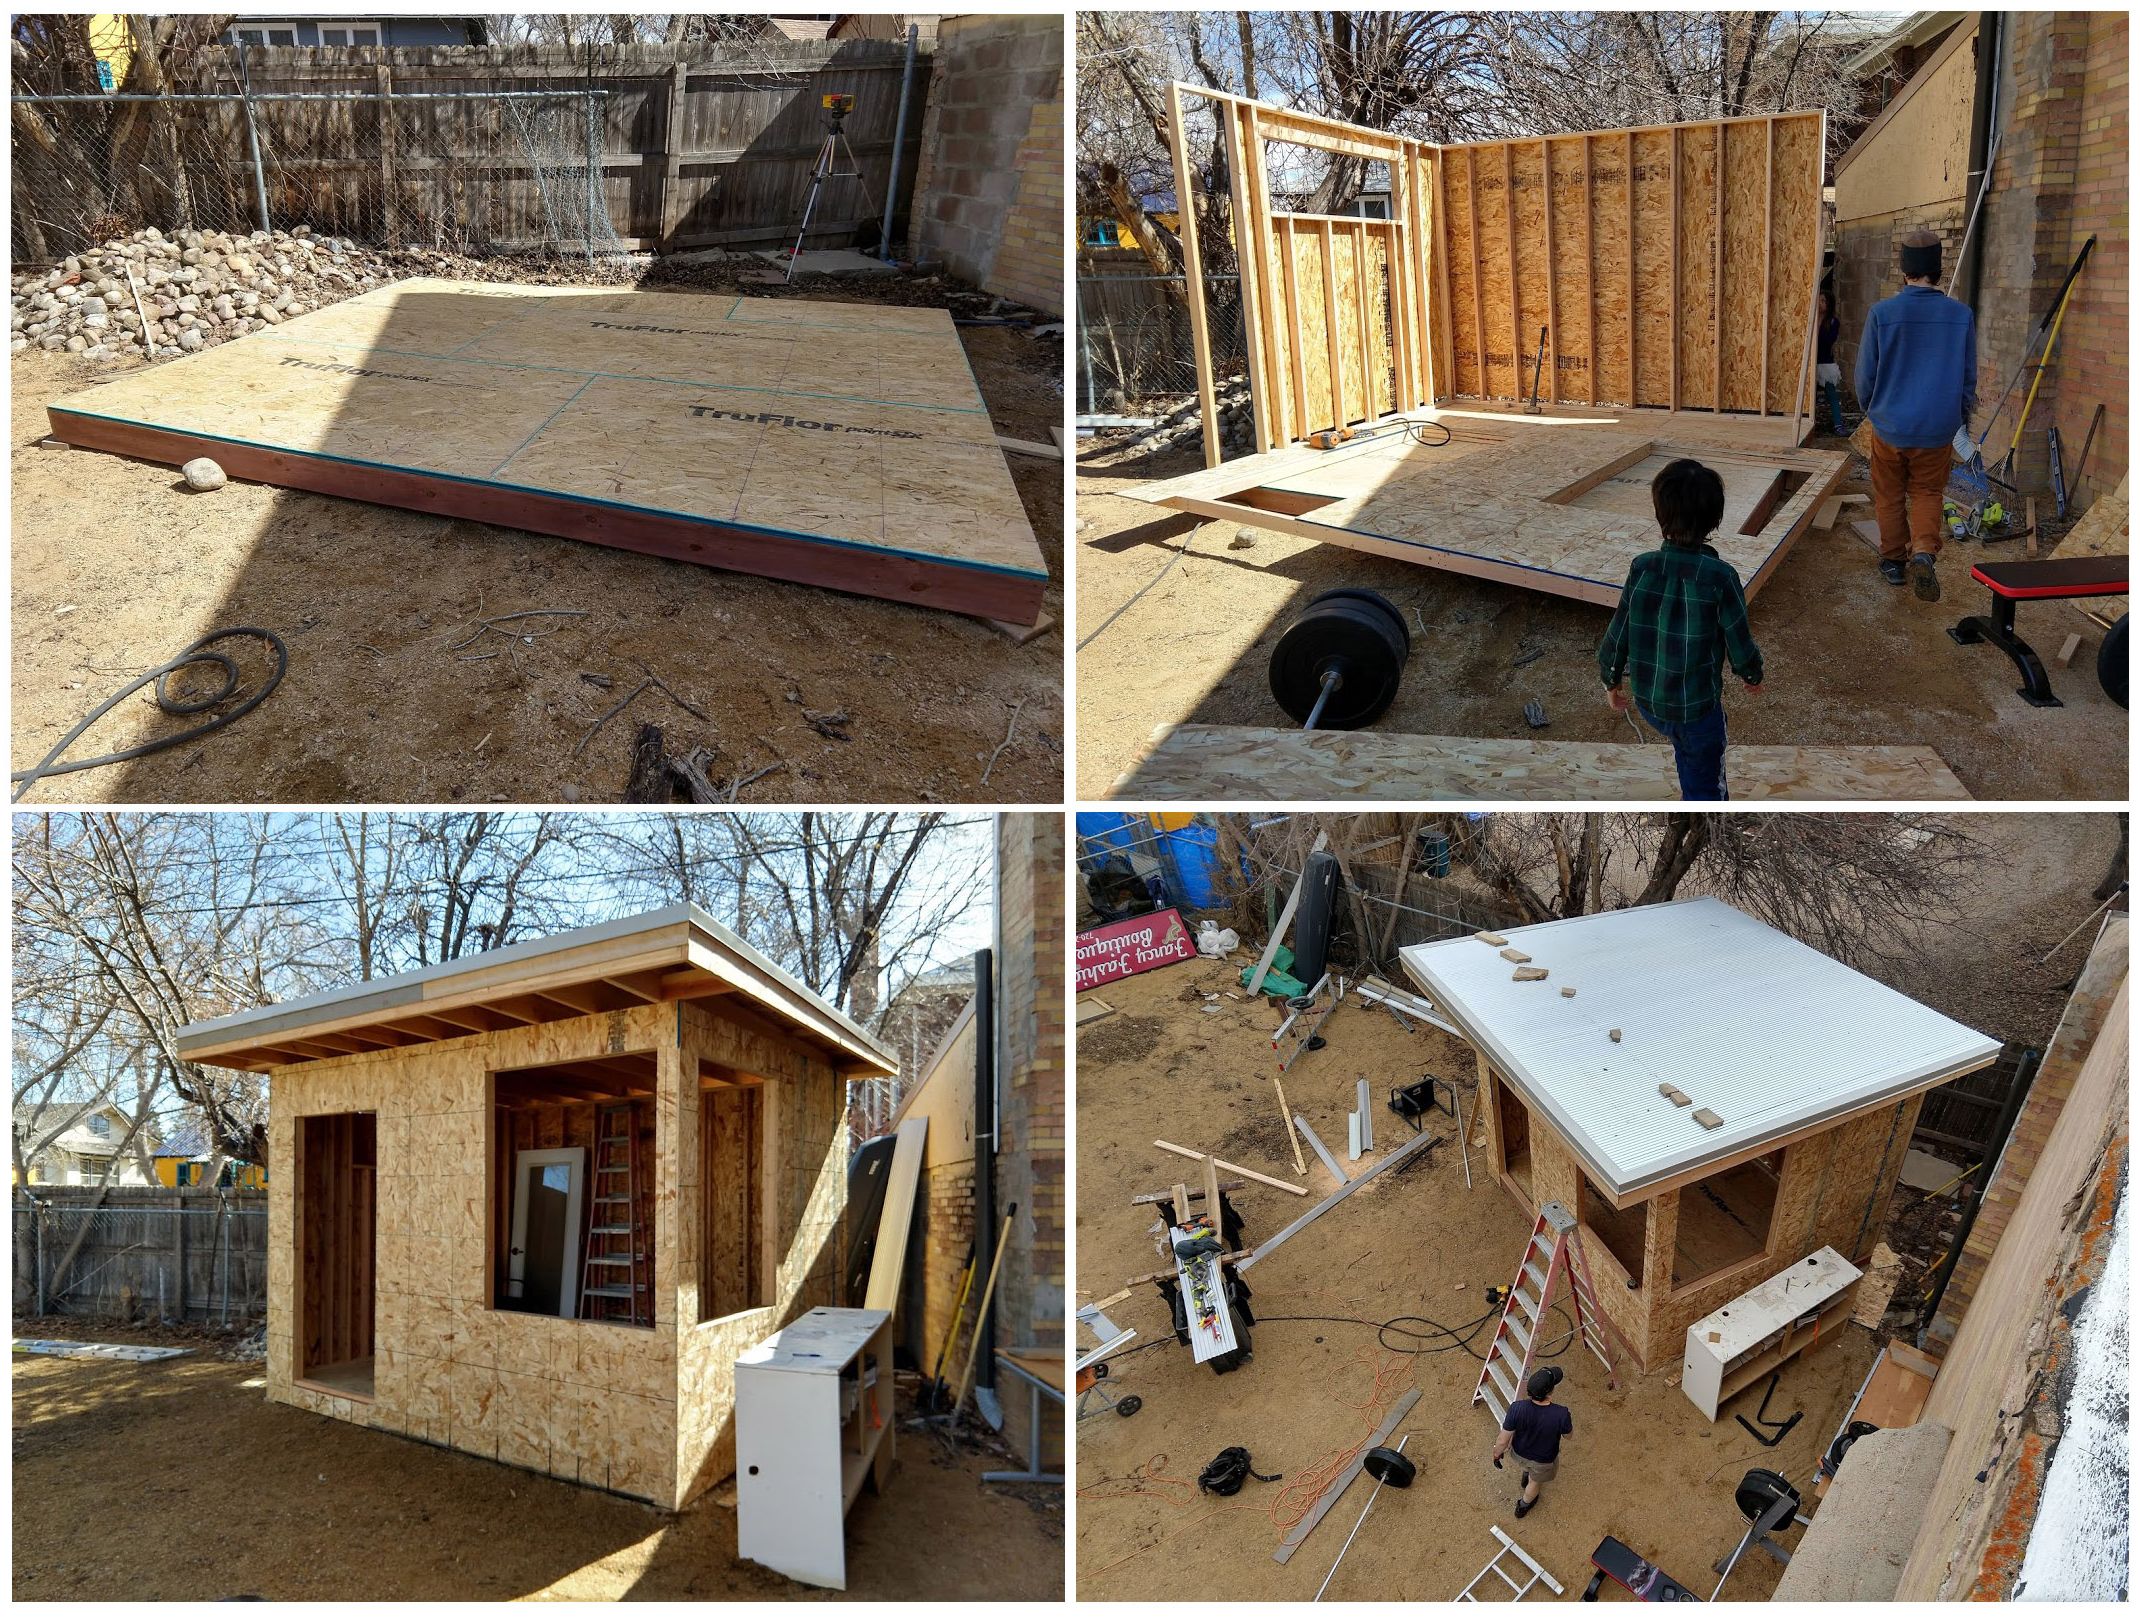
Framing and roofing.
A Metal Roof (of course)
I wanted a relatively flat-looking roof, so I cut wedge-shaped 2x4s and nailed them to the tops of the roof rafters before adding sheathing. This results in a slope of only 2%, but with a careful underlayment job and the seamless nature of metal roof sheets when compared to shingles, I have found it is nicely watertight. If in doubt, you can add more slope or use a rubber EPDM roof. The other advantages of metal: longer lifespan, lighter weight, and better protection from summer heat.
Insulation and Siding
Various wall layers revealed, insulation, lights, super frugal wood floor!
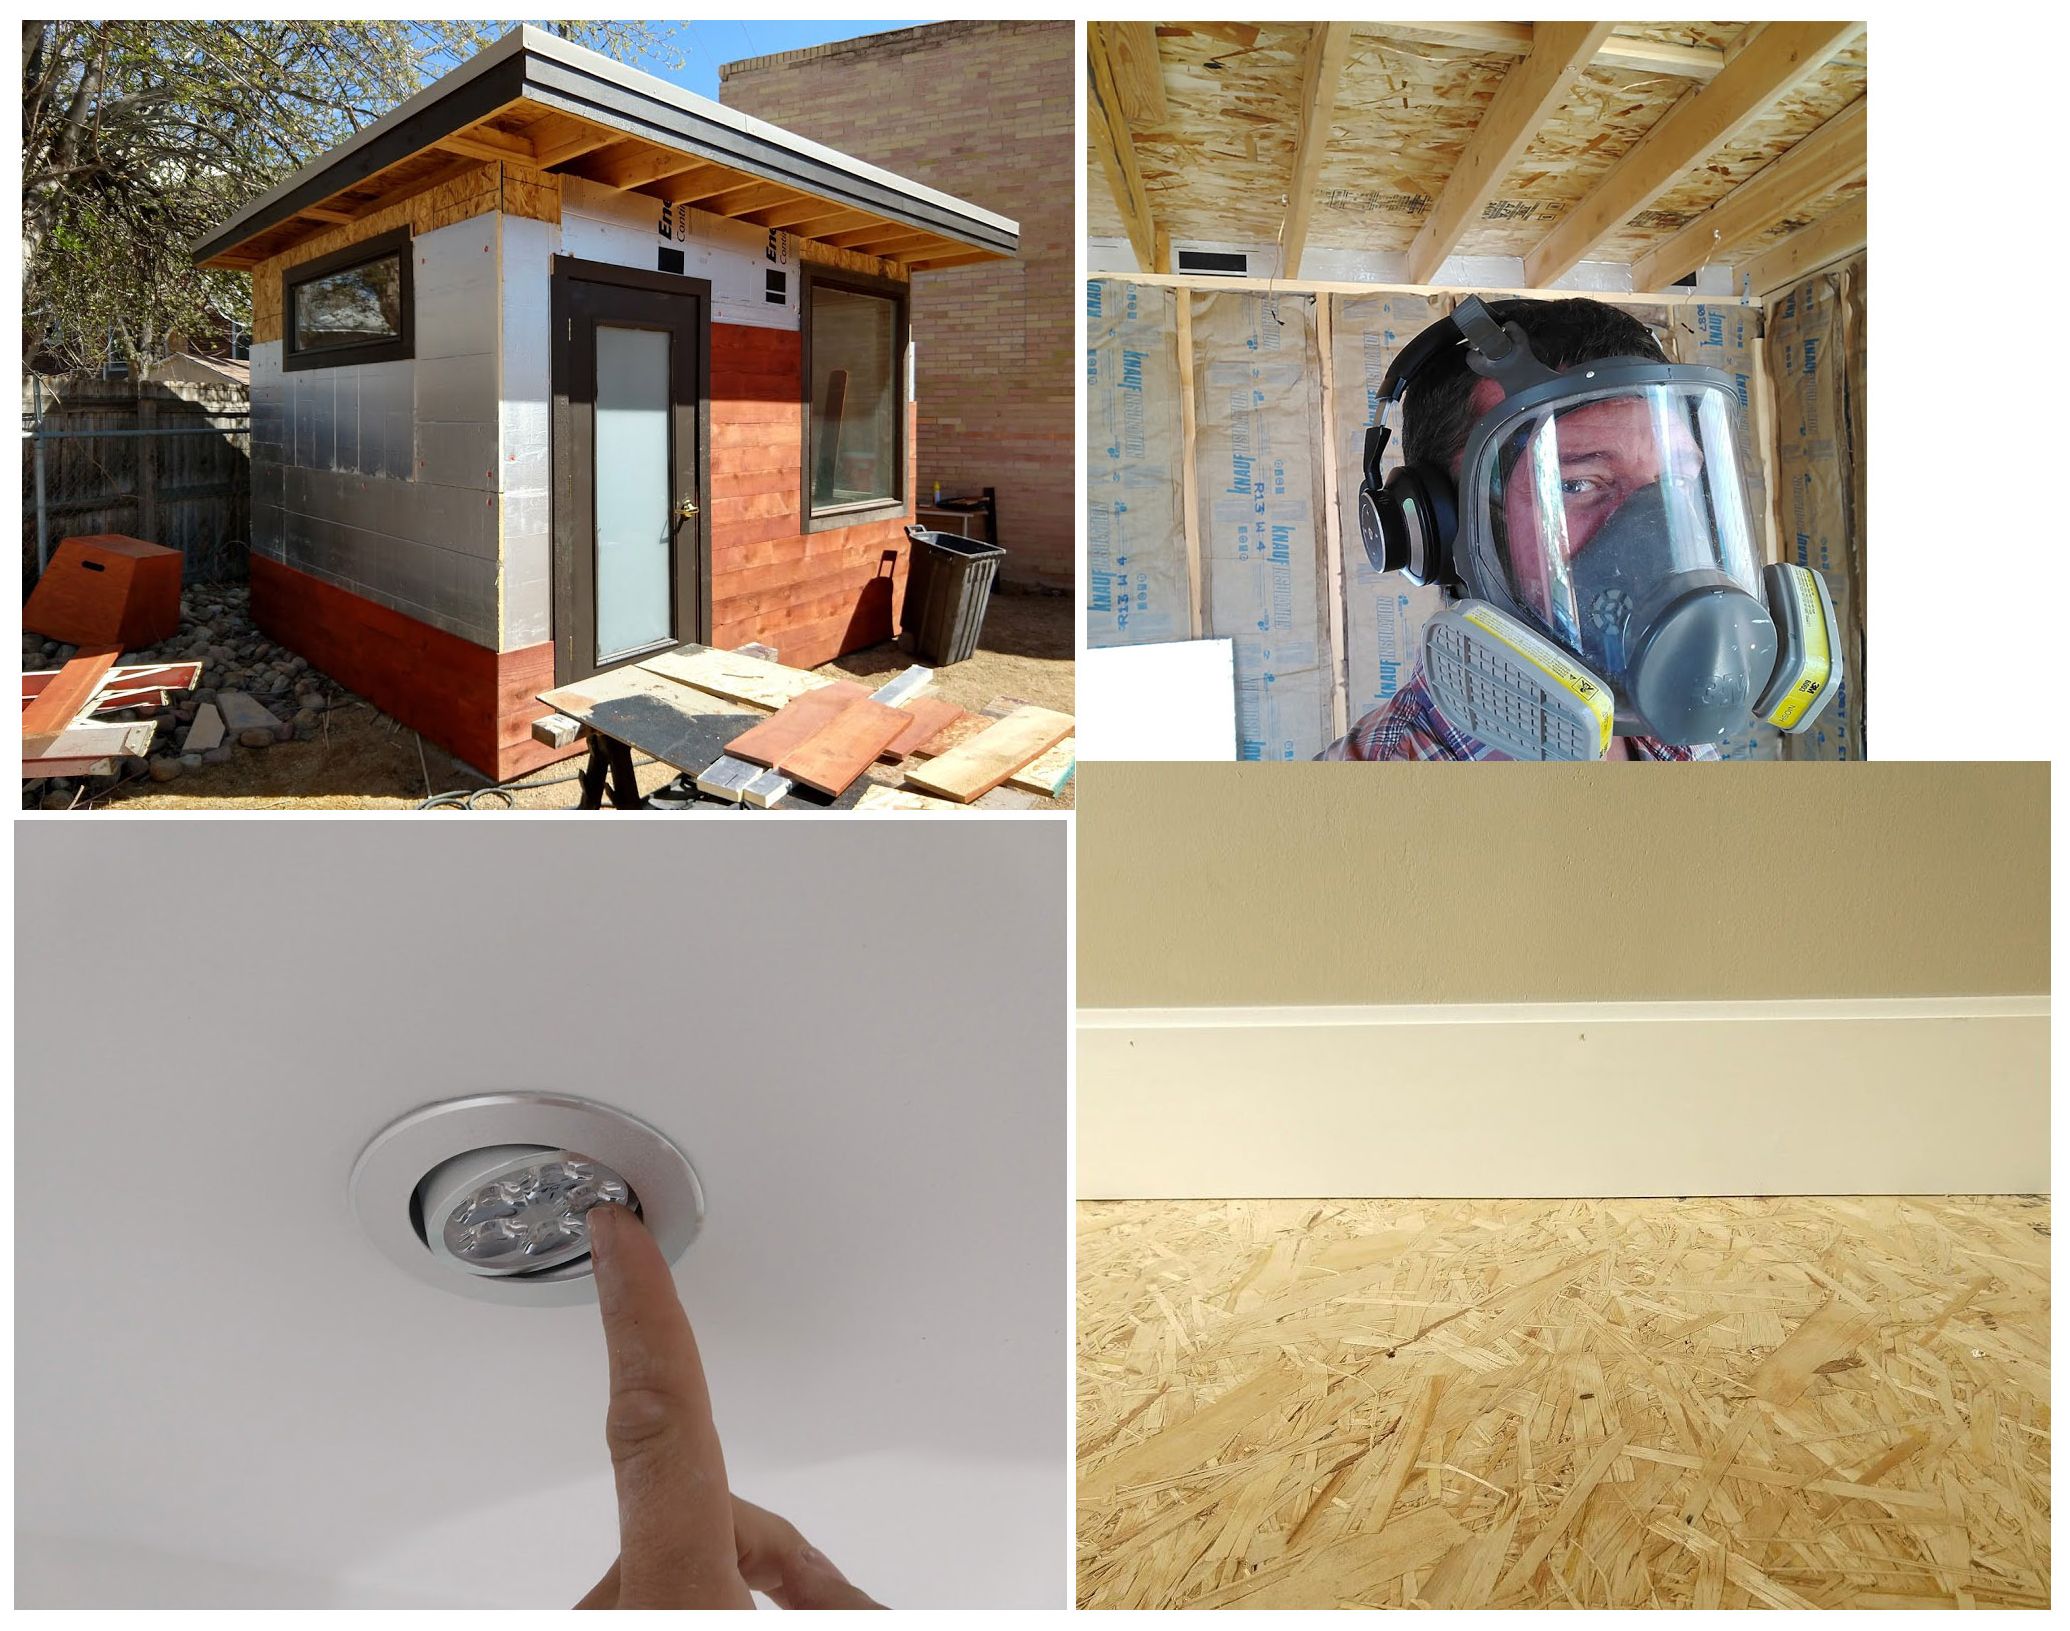
On top of those handy pre-sheathed walls, I added 1"^3 foil-covered foamboard, then some stained cedar fenceboards to create the reddish exterior you see in these pictures. Although the cedar gets quite a few compliments, it was an experiment I wouldn't repeat: the boards expand and contract in changing weather and leave visible gaps at times. Next time, I'll use more wavy metal siding, or something prefinished with an interlocking tongue and groove profile.
Electrical was done exactly the same way you'd wire up a normal house, with outlets and switches in AC Romex-style wiring. But on a tinyhouse like this, you might choose to have it all terminate at a male outdoor receptacle on an exterior wall like an RV or camp trailer, so you can run the whole thing from a good extension cord.
Insulation was just basic batts in this case, but you can use spray foam for even better performance. I drywalled everything using standard 1/2"^3 "lightrock" wallboard, hoping to keep the structure weight down in general, in case this thing ever needs to be moved with a forklift.
For lighting, I used these LED lights I found at Amazon at $4.20 per fixture.

The bare drywall stage - one of so much promise.
The Final Touches - Interior Trim, Furniture and Climate Control
At this stage in the construction story, I had something that looked like any other ready-to-finish example of modern house construction, and it was such a happy and familiar feeling. It's a blank canvas but also a very solid one upon which you can create anything - an office, a bedroom, music studio, living room. Or if you've got the pipes for it, a kitchen or even a bathroom with a fancy shower.
Normally by this stage in building a house, you've spent at least $100 per square foot, so you can imagine the pleasantly Mustachian feeling I got when I arrived here at about $22.
So to keep the frugal trend going with the floor, I decided to try just smooth sanding the raw OSB with a good belt sander and clearcoating it with this really tough floor urethane. It came out looking pleasant, and is very durable and mud/gravel resistant. But I found the sanding was a slow process - throwing in a basic but attractive engineered wood floor at under $2 per square foot is probably a better idea next time at only slightly higher cost, unless you are building a big enough space to justify renting a real floor sander.
I made my own trim and window jambs by buying three 4i-8 sheets of 3/4"^3 MDF and slicing them up on the table saw. Like the floor, this adds a bit of labor, but the benefit is you can get nice beefy trim in whatever dimensions you like (and even throw in some matching custom shelving and built-in cabinetry!) and save a couple hundred dollars per room.
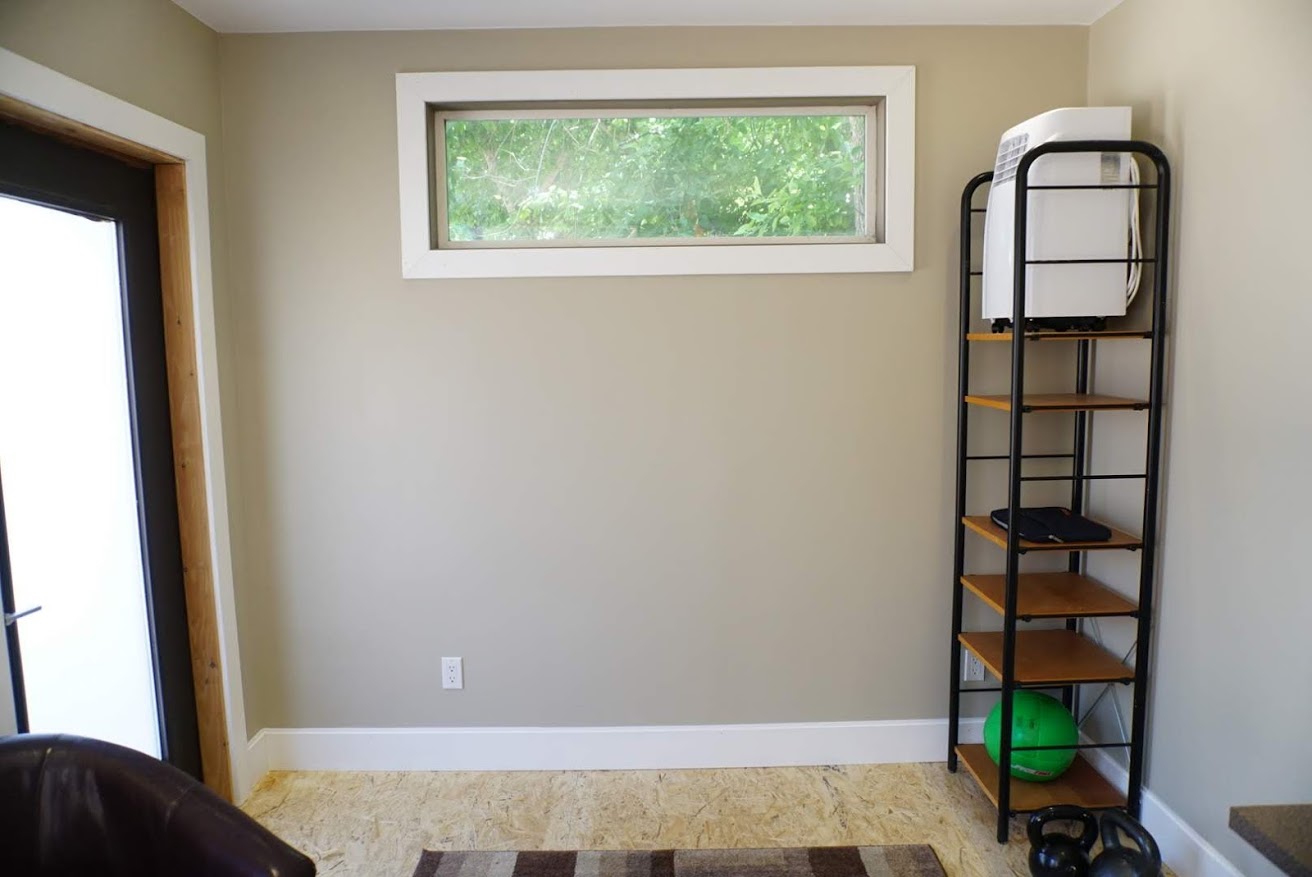
The portable air conditioner occupies only one shelf.
For furniture, I picked out a mixture of stuff I already had, an Ikea desk frame from Craigslist, and a nifty chairside table from a local big box store.
Finally, I added some simple but effective climate control by just throwing a low cost portable AC from amazon up on the shelf (it vents through a 6"^3 hole I cut to the exterior). In the winter, I'll just stash that little air conditioner somewhere and replace it with a silent oil-filled electric radiator for heat.
By plugging either of these machines into a wifi-controlled electrical outlet, I can even control the heating and cooling from anywhere using an app on my phone, as I already do for the various patio lights and ventilation fans I have in my life.
So do YOU want a Tiny House?
The real point of this article is just to share the idea that small structures can be very useful for many things. They are quicker and cheaper than creating a traditional house or building an addition onto one. They may allow you to have a guest house or home office or even an AirBnb rental in space that was formerly just a water-sucking part of your back lawn. Many cities allow you to place small things like this in your yard without requiring a building permit. And if you have the skills to build these things, you can even create an instantly profitable business cranking them out to satisfy the strong demand.
As for me, I'm hooked - later this year I'll build a second one of these things here at MMM-HQ. And perhaps I'll even get a chance to help someone build yet another in a tropical seaside location this winter, as part of my ongoing "Carpentourism" habit.
Happy downsizing!
-
*except my Mum, who still regrets letting so many teenagers run free and attract the ire of the older neighbors and occasionally the police department. Sorry Mom.. but also, thank you so much!
** I also took advantage of the large chunk of spending for a tiny bit of "travel hacking", picking up an Amex Platinum card that gives me about $1000 of cash/travel credits only if I can spend $5000 within the first three months. For travel hackers, timing the acquisition of a new rewards card to coincide with a chunk of planned spending can be a useful way to squeeze the travel budget into an existing renovation budget.