How to Replace Your Own Furnace

Egads! This is the furnace that came with an old Victorian house I'm currently helping some friends renovate.
It seems that every house I've ever owned has needed a new furnace. I mean sure, the old furnace was still there clunking along and producing heat, but it was always some embarrassingly old thing installed by someone that obviously didn't care about energy efficiency (or it predated the invention of efficient furnaces entirely).
But like all owners of these same houses before me, I let it slide and let projects that seemed more urgent on the surface suck up my time. I renovated kitchens and bathrooms or replaced roofs. It was financially easy to justify the procrastination as well: heating bills for a typical house are under $1000 per year in my area, but if you hire out the installation of a new furnace you're looking at about five grand. Even more if you're replacing the air conditioning system at the same time. Even if you could find one that ran on free magic unicorn dust you would have a six year payback and more realistically it will take decades.
So I let the slow leakage continue and always felt a small hole in my heart every time that machine kicked on, because for Mr. Money Mustache, energy efficiency is a moral issue even more than it is a financial one.
I figured the numbers would work out much better if I could actually do the replacement job myself, because a top-of-the-line gas furnace only costs about $1200 online these days. But I didn't know exactly how to do it and there never seemed to be a good time to learn*. Nobody I knew had ever replaced their own furnace, and the building materials stores don't even sell them - everybody says you need to hire a pro for such a thing.
But finally, here in the year 2015 and at the embarrassingly late age of 41, I have finally studied up on the necessary tricks, successfully installed two beautiful high-efficiency gas furnaces alongside friends, and am here to tell you it is a perfectly reasonable do-it-yourself project after all**. So let's get started.
Step 1: How the hell does a furnace work?
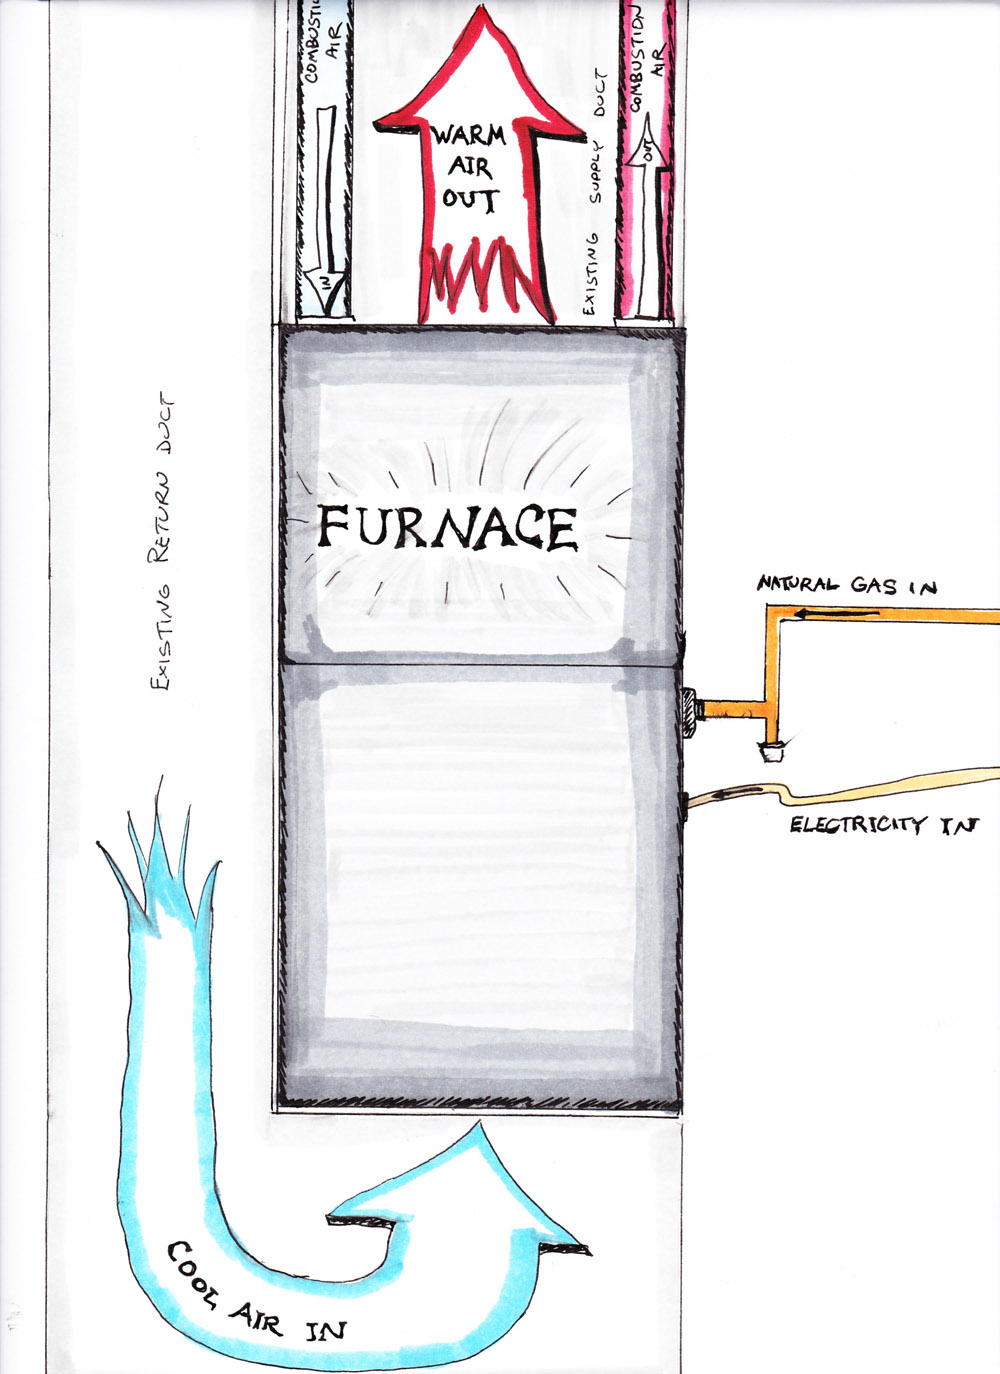
When you get right down to it, a gas furnace is just a box-shaped heater connected to some tubes. These days, they have added more internal complexity to make them more efficient, but all you really need to know as the installer is this: Cold Air in, Warm air out, Gas and Electricity in, Combustion air In and Out. It gets even easier if you write these same things on a picture of a box (aka furnace).
Figure 1: Furnaces are Simple
Step 2: What kind do I need and where do I buy it?
In general, you'll want a high-efficiency (94% or higher) condensing furnace, with variable speed blower and roughly the same overall heating capacity as the one you're replacing. It can be smaller in physical size (they have shrunk nicely over the years), but probably not much bigger since you have to fit it into the same space.
Actually finding a place that sells furnaces can be tricky. Like plumbing was a few decades ago, the heating and cooling industry is still an insider's game, with low-profile stores that only sell to contractors, and contractors that insist their field is far too dangerous and exacting for any homeowner to master. If your personality type is at all similar to mine, the very words "consult a qualified installer" piss you off a little and make you want to learn the trade.
Typing "where to buy a gas furnace" into Google leads to a mixed bag you can sift through, but I ended up finding the best results for my situation at a place called Alpine Home Air. Specifically, for both recent installs, my friends just went for the top-of-the-line Goodman 96% unit.
For a bit more background reading on the field, Consumer Reports has a free furnace buying guide.
Step 3: OK, Got The Furnace. What Other Parts Do I Need?
Remembering that diagram above, you're hooking up air, gas, intake, exhaust, and electricity. Everything will be available at your local building materials shop, with the possible exception of a condensate pump.
If you're installing the furnace from scratch or replacing a Crazy Spaghetti Octopus monster and want to re-do the ducting in your basement completely, you might also pick up:
- a return air box : this is just a big sheet metal box that you set your furnace on. It serves as a big air scoop where you can connect all your return air ducts, and it also has a convenient slot to hold the air filter.
- a supply air plenum to handle the heated air on its way out. You'll cut holes in this to connect supply ducts to the rest of your house.
Step 4: Let's Hook This Sucker Up
Read the Manual:
Somebody actually cared when they wrote this instruction manual.
I was pleasantly surprised to find that the Goodman furnace we used came with a fully detailed installation manual - none of this consumer-oriented "run screaming and consult a professional" attitude. Every hookup and specification, right down to how far to keep your vent pipes away from exterior windows, was described clearly with pictures. I spent a leisurely hour at home reading it from cover to cover the night before beginning the installation, which allowed me to have the big picture in mind on the big day.
Household Air:
 Cool air (also called 'return air') gets sucked in through the bottom of the furnace, heated, and blown out the top ('supply'). If you are replacing an existing furnace, you just need to carefully extract the old furnace from the big metal boxes, then seal the new unit to the same boxes. You can reshape or extend them as necessary.
If you have central air conditioning, there will be a separate metal box stuck in with everything else. Just leave it in place, be careful not to break the tubes and wires, and it will continue to work with your new setup.
Tools and tips: You cut the metal with tin snips or a grinder with metal cutoff wheel. Fold pieces nicely with a metal brake. Screw things together with sheet metal screws. Create airtight and heat-resistant joints with silver foil tape (not duct tape). Brush on duct sealant to all potential air joints to create a better seal. And above all, instantly master sheet metal duct work with a few YouTube videos on the subject.
Combustion Air and Exhaust:
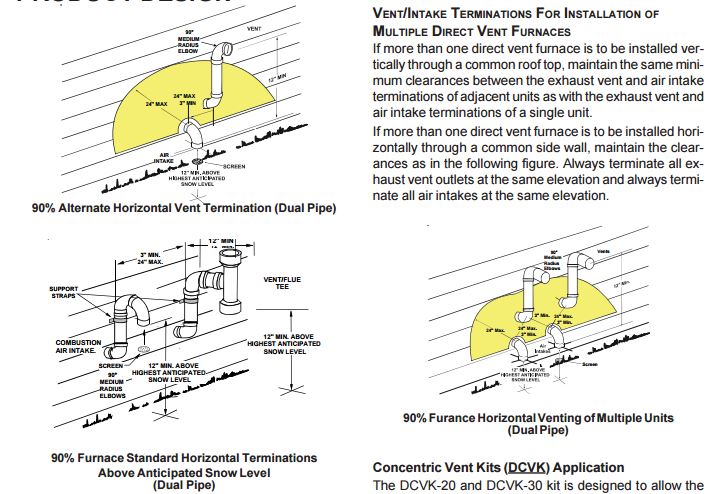
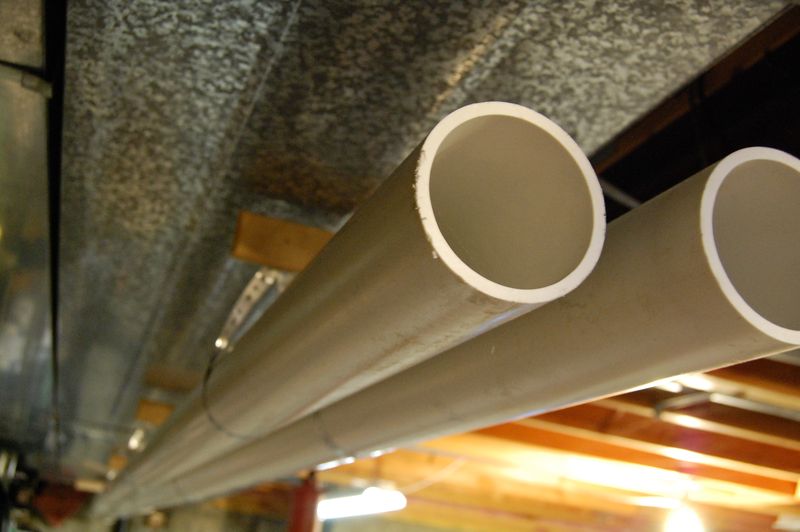 Here we are just running two pieces of 3"^3 PVC pipe (you can even use 2"^3 for shorter runs) from the furnace to an inconspicuous place on the outside of your house. It's a fun design puzzle, deciding how to route the pipe and figuring out which fittings to use to accomplish it. Your goal is a classy looking job. You cut it with a miter saw or sawzall, and glue it with purple PVC primer and PVC glue. Again, watch a few videos if you need to learn how to handle this stuff.
As a huge bonus, these same plastic piping skills will allow you to run drain pipes, which lets you build your own bathroom from scratch (future article?)
Gas Supply:
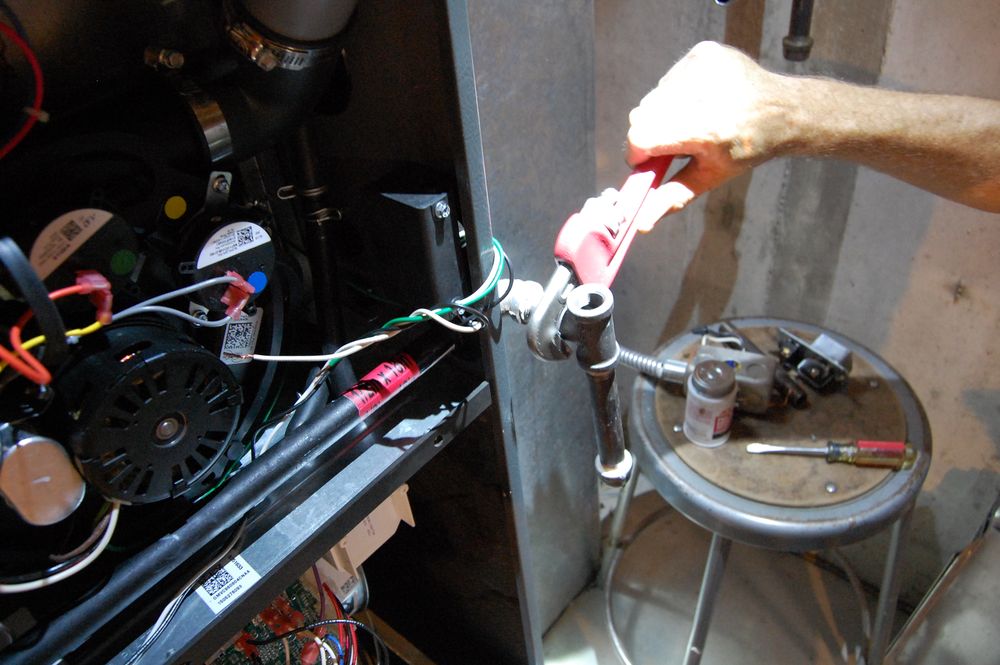
My friend Mike uses a pipe wrench to twist on a length of black pipe.
Although people tend to be afraid of working on gas piping (after all, you can blow up your entire house if you get just the perfect gas leak and ignite it), it is easier than ever and quite rewarding to do yourself.
An existing furnace will already have a gas line, complete with shutoff. So in most cases, you can just connect your new furnace with a standard flexible gas connector.
But if you need to change the routing, you can turn off your gas supply at the outside meter, use a big pipe wrench to unthread the existing black gas pipe, and buy new lengths and fittings at the store to create your new layout. They will even custom-cut and thread the pipe for you, or you can do it yourself if you own a pipe threading tool. Once you have the right pieces, wrench everything together with plenty of pipe thread sealant (aka "pipe dope") to create gas-tight joints.
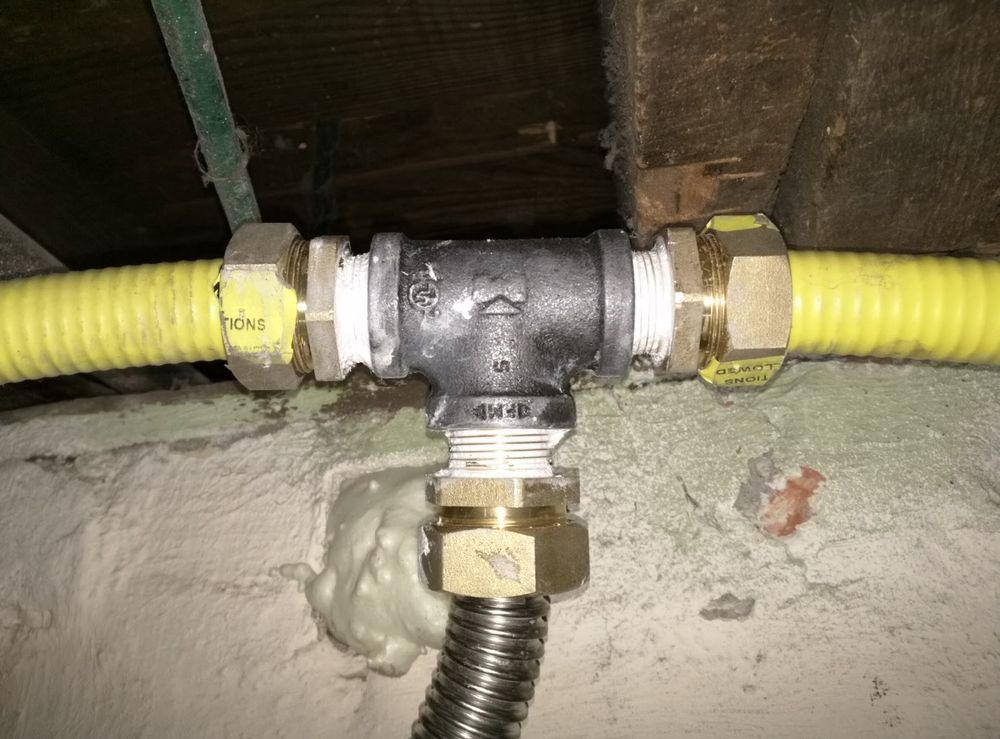
Three pieces of CSST come together at one traditional T-joint, where we split off a branch to feed the existing water heater.
These days, I usually bypass the black gas pipe entirely and use the newer flexible Corrugated Stainless Steel Tubing (CSST for short) instead. This saves time and allows you to thread the tubing right through joists and around corners, keeping it out of sight - especially useful if you're installing in basement that may eventually be finished. The fittings come with detailed instructions and you can of course watch videos on CSST installation as well.
When everything looks perfect, you turn on the gas and check thoroughly for leaks with a soap solution, your nose, and a gas leak detector.
Electricity:
The furnace uses electricity to run its control electronics, igniter, and blower. But you just need to connect it to one normal (15 amp) household circuit. Black wire is hot, white is neutral, and green/copper is ground. You make the connection right inside the junction box built into the furnace, although you'll want to mount a switch somewhere in the circuit so you can power down the furnace.
Another option (if your inspector allows it) is to wire on a cord and simply plug the furnace into a nearby electrical outlet. This is simpler, and allows you to plug the furnace into a backup power source (generator or large battery) to restore heating in the event of a power failure.
Condensate (aka dripping water):
When an efficient furnace runs, it condenses some water out of the hot combustion gases. This drips slowly out of the furnace through a little plastic spout, and you need to connect that to a flexible plastic tube that takes the water somewhere safe. If you have a floor drain in the basement, pipe the water there. If you need to lift the water higher, you dump it into a condensate pump, and have the output go to a nearby plumbing drain.
Thermostat wiring:
You are down to the really easy stuff now! You can follow the instructions for the furnace and thermostat, but in my case I just connected the red, green, yellow and white wires on both sides. For a longer explanation of what the wires do, here's a guide.
If you're looking to upgrade your thermostat at the same time, I am a fan of my Lux Geo Wi-Fi enabled thermostat. It has all the control-it-from-anywhere-with-your-smartphone usefulness of the Nest and EcoBee, but drops some of the non-useful frills and is $100 cheaper. Also works with plain AA batteries if you're using it with a furnace that does not provide 24V power (the Goodman does).
And You're Done!
It'll take some work and you will learn a few things, but at the end of the project you'll have a beautiful new furnace that provides a sizable return on your investment of time and money.
Here's a picture of one of the finished installations at a friend's house. From bottom to top, notice the custom return plenum, furnace, existing A/C box, PVC combustion air piping, and my homemade supply plenum that funnels the air to the old ductwork.

Success!
Successful DIY mentality

Two local friends exchange witty banter even as they build custom ductwork for a current project house. This was a bigger job as the original 1910 house had no real ducting at all - we had to open up walls and run pipes to every room in the house. Your furnace upgrade will be easier.
When I first started do-it-yourself home renovation, at least part of the motivation was a desire to save some serious money. But in recent years the need to conserve money has faded away completely and yet I find myself more enthusiastic about building and fixing stuff than ever. This is because learning new skills, solving puzzles and creating finished products you can be proud of is not just something you do for money - it's the purpose of life itself.
So when confronted with a choice between fixing something yourself and hiring it out, you do well if you push your comfort zone just little a bit further each time. Just remember the mantra: "This is possible, and plenty of people with fewer advantages than me have accomplished the same thing many times in the past"
Then you get to work, read the instructions, tinker, make mistakes, learn, and succeed. And continue to build on that success, forever.
Further Reading: You can find many more of my DIY-Themed Articles with the shortcut http://www.mrmoneymustache.com/tag/diy/
* When I bought my current house I ditched the hot air furnace entirely and built an under-floor radiant heat system instead. Now into its second winter, we are still loving it.
**Do you need a permit and Inspection?
In general, yes - replacing a furnace is something your city wants you to get a permit for. But it's not a big deal - going through this process is a nice low-cost safety check to make sure you get the details right. And having an inspected, approved permit on file will make it easier to sell your house further down the road.